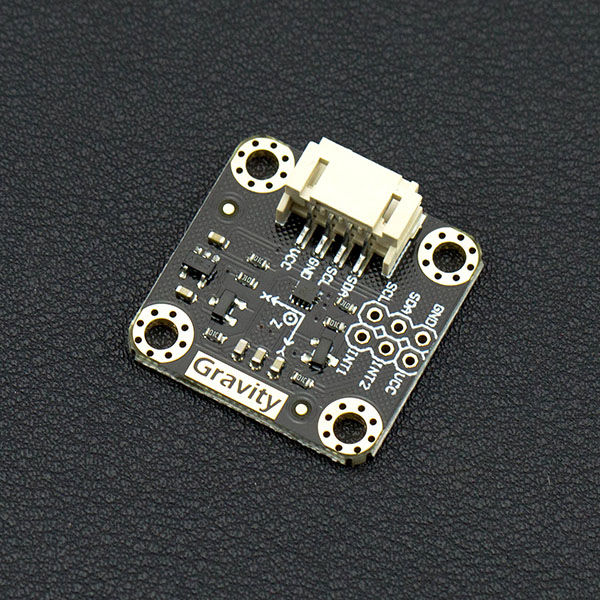
产品简介
DFRobot超低功耗3轴加速度传感器,采用MEMS LIS2DH芯片解决方案,支持高性能超低功耗工作模式。模块使用Gravity I2C接口设计,上手简单,即插即用。内置LDO电源管理芯片,支持3.3~5V宽电压供电,并且板载I2C电平转换,兼容Arduino 3.3V以及5V主控器。
LIS2DH加速度计相对传统的ADXL345在稳定性以及功耗上都有一定的优化,低功耗模式下仅为2μA(普通模式11μA),并且最高支持5.3KHz输出频率,拥有±2g/±4g/±8g/±16g四档可选量程,支持16位数据输出。传感器内置2个独立的可编程中断发生器的自由落体和运动检测,能够实现低功耗下自动检测,实现中断唤醒。可以广泛应用于各类可穿戴设备的原型设计中。
技术规格
- 工作电压:3.3V~5V
- 工作电流:2uA(low-power mode 50Hz ODR) / 11uA(normal mode 50Hz ODR)
- 接口方式:Gravity-IIC接口
- 可选标尺:±2g/±4g/±8g/±16g
- 频率:1Hz~5.3KHz
- 6D/4D检测定位
- 16位数据输出
- 2个独立的可编程中断发生器的自由落体和运动检测
- 内置96级别的16位数据输出FIFO
- 万克高抗撞击能力
- ECOPACK®RoHS和“绿色”标准
- 工作温度:-40℃~+85℃
- 模块尺寸:26.2 × 26.2(mm)/1.03 x 1.03(inches)
- 安装孔位置:20 x 20(mm)/0.787 x 0.787(inches)
- 安装孔尺寸:内径3.1mm/外径6mm
应用
- 单击/双击检测
- 自由落体检测
- 倾角测量
- 切换横屏/竖屏模式
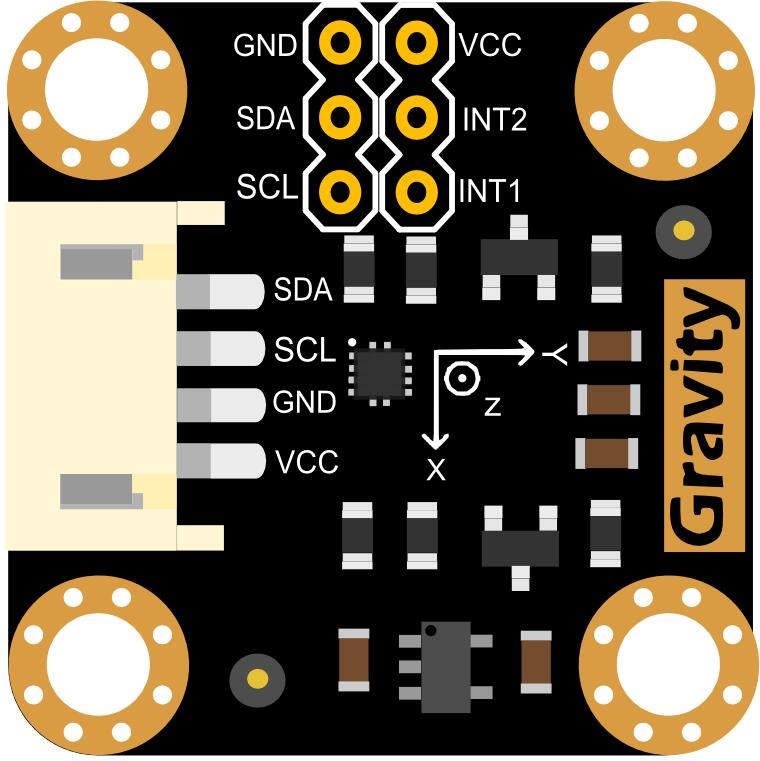
引脚说明
| LIS2DH | Arduino |
|---|---|
| VCC | 5V / 3V3 |
| GND | GND |
| SDA | IIC数据 |
| SCL | IIC时钟 |
| INT1 | 中断1 |
| INT2 | 中断2 |
注意:V1.0版本有一处设计错误:INT1和INT2丝印标注与实际电气连接是相反的,后续版本的产品已修正了该错误。
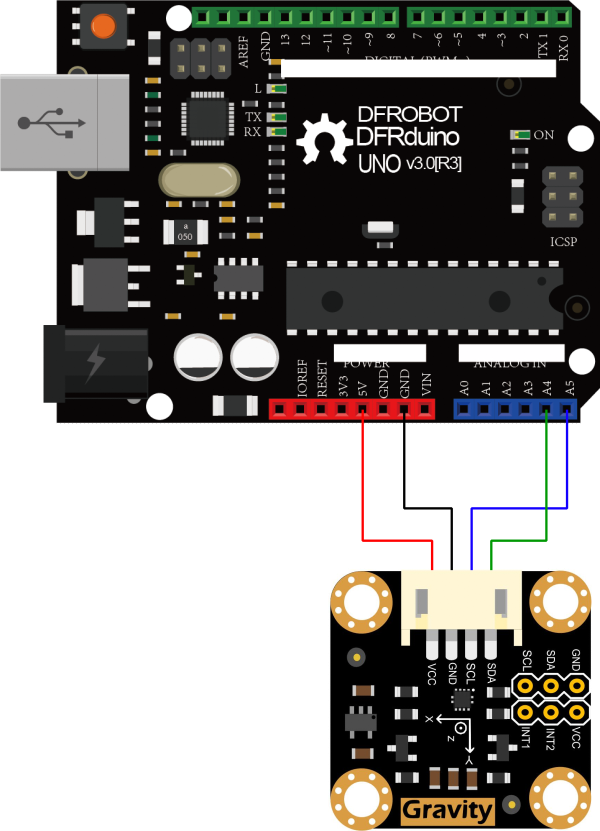
连线图
| LIS2DH | Arduino |
|---|---|
| VCC | 5V / 3V3 |
| GND | GND |
| SDA | A4(SDA) |
| SCL | A5(SCL) |
样例代码
- 下载LIS2DH库文件,如何安装Arduino 库? 复制下面代码到arudino IDE,编译下载到uno开发板。
/**!
 * @file getAcceleration.ino
 * @brief Get the acceleration in the three directions of xyz, the range can be ±2g、±4g、±8g、±16g
 * @copyright  Copyright (c) 2010 DFRobot Co.Ltd (http://www.dfrobot.com)
 * @license     The MIT License (MIT)
 * @author [tangjie](jie.tang@dfrobot.com)
 * @version  V1.0
 * @date  2021-01-16
 * @url https://github.com/DFRobot/DFRobot_LIS
 */

#include <DFRobot_LIS2DH12.h>

/*!
 * @brief Constructor
 * @param pWire I2c controller
 * @param addr  I2C address(0x18/0x19)
 */
DFRobot_LIS2DH12 acce(&Wire,0x18);

void setup(void){

  Serial.begin(9600);
  //Chip initialization
  while(!acce.begin()){
     Serial.println("Initialization failed, please check the connection and I2C address settings");
     delay(1000);
  }
  //Get chip id
  Serial.print("chip id : ");
  Serial.println(acce.getID(),HEX);

  /**
    set range:Range(g)
              eLIS2DH12_2g,/< ±2g>/
              eLIS2DH12_4g,/< ±4g>/
              eLIS2DH12_8g,/< ±8g>/
              eLIS2DH12_16g,/< ±16g>/
  */
  acce.setRange(/*Range = */DFRobot_LIS2DH12::eLIS2DH12_16g);

  /**
    Set data measurement rate:
      ePowerDown_0Hz
      eLowPower_1Hz
      eLowPower_10Hz
      eLowPower_25Hz
      eLowPower_50Hz
      eLowPower_100Hz
      eLowPower_200Hz
      eLowPower_400Hz
  */
  acce.setAcquireRate(/*Rate = */DFRobot_LIS2DH12::eLowPower_10Hz);
  Serial.print("Acceleration:\n");
  delay(1000);
}

void loop(void){

  //Get the acceleration in the three directions of xyz
  long ax,ay,az;
  //The measurement range can be ±100g or ±200g set by the setRange() function
  ax = acce.readAccX();//Get the acceleration in the x direction
  ay = acce.readAccY();//Get the acceleration in the y direction
  az = acce.readAccZ();//Get the acceleration in the z direction
  //Print acceleration
  Serial.print("Acceleration x: ");
  Serial.print(ax);
  Serial.print(" mg\t  y: ");
  Serial.print(ay);
  Serial.print(" mg\t  z: ");
  Serial.print(az);
  Serial.println(" mg");
  delay(300);

}
- 实验效果,输出数据如下图所示:

Mind+(基于Scratch3.0)图形化编程
- 下载及安装软件。下载地址:https://www.mindplus.cc 详细教程:Mind+基础wiki教程-软件下载安装
- 切换到“上传模式”。 详细教程:Mind+基础wiki教程-上传模式编程流程
- “扩展”中选择“主控板”中的“Arduino Uno”。 "扩展"“传感器”中搜索选择“LIS2DH三轴加速度计”。详细教程:Mind+基础wiki教程-加载扩展库流程
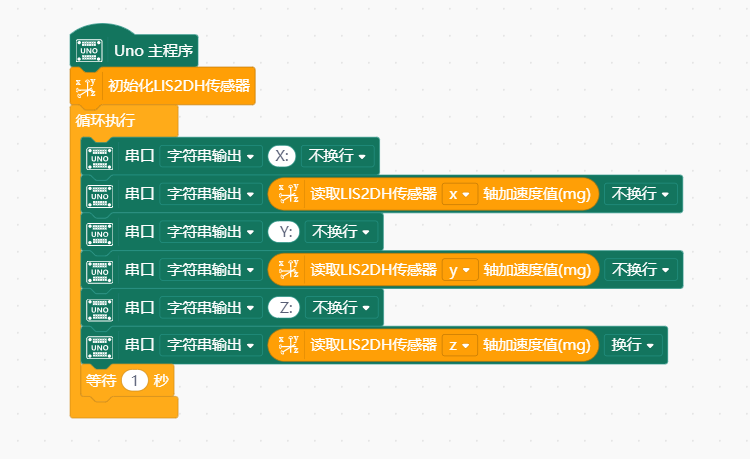
- 进行编程,程序如下图:
- 菜单“连接设备”,“上传到设备”
- 程序上传完毕后,打开串口即可看到数据输出。详细教程:Mind+基础wiki教程-串口打印
姿态检测 — 行空板K10
项目功能描述
本项目使用 SEN0224(LIS2DH)I2C 三轴加速度计实现姿态检测:模块通过 I2C 返回 X、Y、Z 三轴加速度(单位 mg)。行空板K10 在终端实时打印三轴数值。
硬件准备
| 器材 | SKU / 型号 | 数量 |
|---|---|---|
| 行空板K10 | DFR0992 | 1 |
| LIS2DH 三轴加速度计 | SEN0224 | 1 |
| 两头PH2.0-4P白色硅胶绞线 | — | 1 |
| Type-C 数据线 | — | 1 |
连线说明
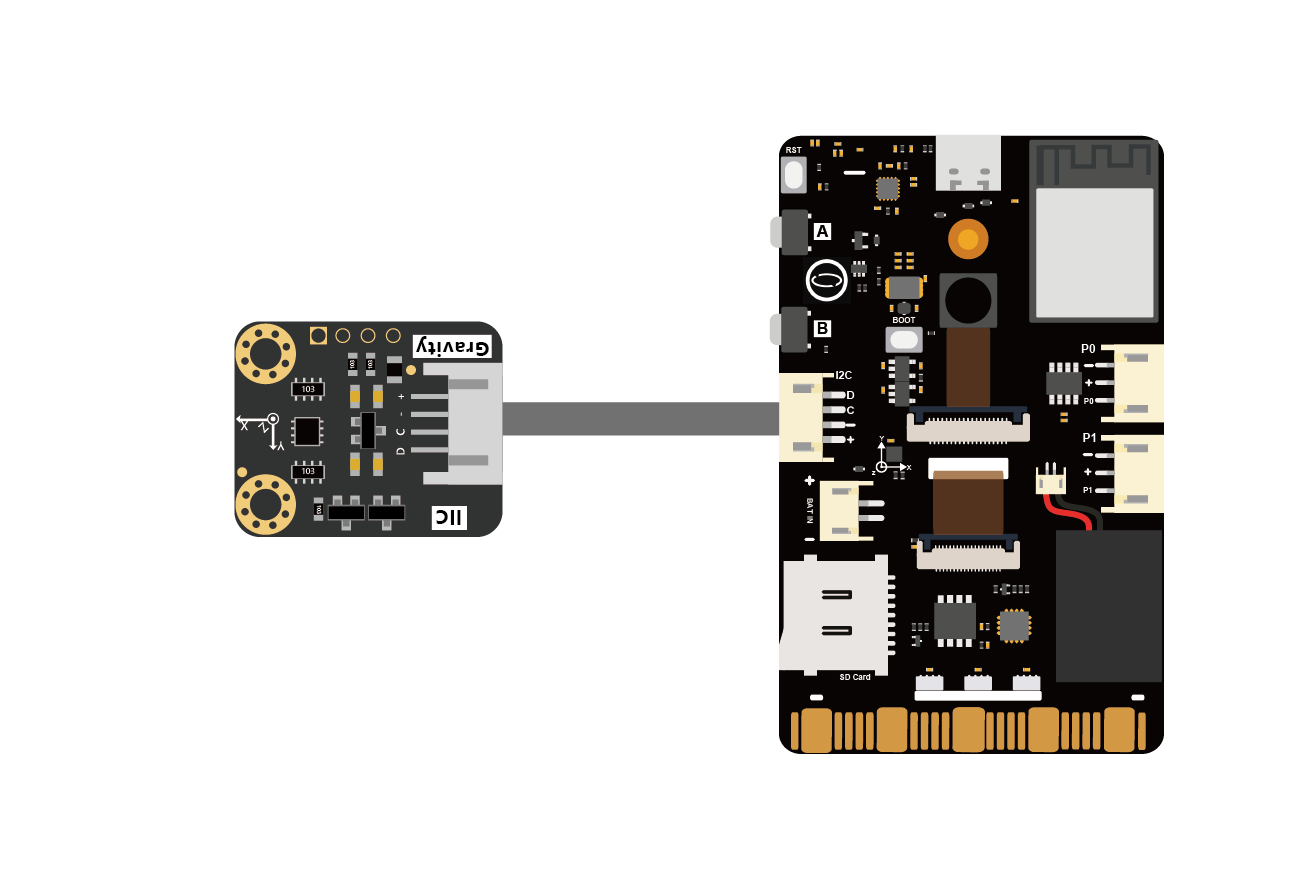
| 模块 | 模块端口引脚 | 扩展板接口 | 注意事项 |
|---|---|---|---|
| LIS2DH 三轴加速度计 | VCC-GND-SDA-SCL | K10 I2C | I2C 地址 0x18 或 0x19 |
软件准备
本项目需加载三轴加速度计库,步骤如下:
- 打开 MIND+ 软件(V1.8.1 RC1.0 及以上版本)。
- 选择「上传模式」,并添加主控板为「行空板K10」,使用 Type-C 数据线连接行空板K10 与电脑。
- 点击左下角「扩展」→ 在「传感器」分类中搜索「SEN0224」并加载。
示例程序(行空板K10)

运行效果
模块静止平放 , X约等于0,Y约等于0,Z约等于1000mg;翻转模块 , Z 轴变为 -1000mg;晃动或旋转 , X、Y、Z 三轴随之变化。

若无效请检查连接线是否插在对应的引脚(SDA / SCL 不能反)。
常见问题
还没有客户对此产品有任何问题,欢迎通过qq或者论坛联系我们!
更多问题及有趣的应用,可以 访问论坛 进行查阅或发帖。
