概述
微波运动传感器是利用多普勒雷达原理设计的微波移动物体探测器。不同于一般的红外探测器,微波传感器通过通过检测物体反射的微波来探测物体的运动状况,检测对象将并不会局限于人体,还有很多其他的事物。微波传感器不受环境温度的影响,探测距离远,灵敏度高,被广泛应用于工业、交通及民用装置中,如车辆测速、自动门、感应灯、倒车雷达等。
由于微波传感器检测对象存在普遍性,在实际的生活应用中,会搭配另一个传感器来做针对性的检测。如微波传感器+红外热释电传感器,能够有效的判断是否有人经过,不会被阳光,被衣物颜色所干扰,也不会对其他物体产生反应。
特性
这种探测方式与其它探测方式相比具有如下的优点:
- 非接触探测;
- 不受温度、湿度、噪声、气流、尘埃、光线等影响,适合恶劣环境;
- 抗射频干扰能力强;
- 输出功率小,对人体构不成危害;
- 探测距离远;
- 支持对非生命类物体的检测
- 微波的方向性很好,速度等于光速;
产品参数
- 工作电压 : 5V±0.25V
- 工作电流(CW): 60mA max., 37mA typical
- 尺寸: 48.5x63mm
- 发射参数:
- 探测距离: 2-16m连续可调(最小范围2m,最大范围16m)
- 发射频率 : 10.525 GHz
- 频率设置精度 : 3MHz
- 输出功率(最小): 13dBm EIRP
- 谐波发射: <-10dBm
- 平均电流 (5%DC) : 2mA typ.
- 脉冲宽度(Min.): 5uSec
- 负载循环(Min.): 1%
- 接收参数:
- 灵敏度(10dB S/N ratio)3Hz至80Hz 带宽: -86dBm
- 3Hz至80Hz带宽杂波 10uV
- 天线增益: 8dBi
- 垂直面3dB波束宽度: 36度
- 水平面 3dB 波束宽度: 72度
引脚说明

| 颜色 | 功能描述 |
|---|---|
| 绿色 | 信号线 |
| 红色 | 电源+ (VCC) |
| 黑色 | 电源- (GND) |
与红外热释电传感器比较

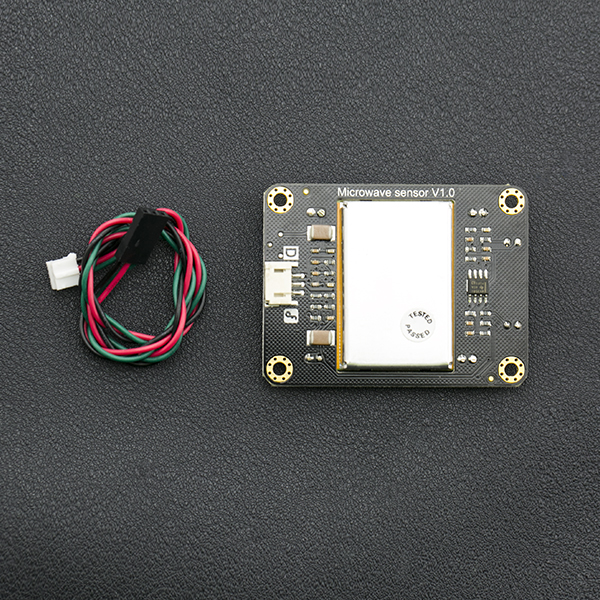
传感器模块说明
天线面说明

信号处理示意图
下图为传感器模块工作原理框图,将传感器接收到的微小信号经过放大,再通过比较电路将信号转换为方波信号,输出0、1数字信号,便于单片机处理。

信号检测范围示意图
下图为微波信号感应范围图。检测角度:与天线平行(方位)方向的检测角度为72°,与天线垂直(俯仰)方向的检测角度为36°

使用时,请注意传感器的正反面,带黄色天线面为正面!!!
误报示意图
下图为隔墙误报的示意。微波对建筑物墙体有穿透能力,泄漏到墙外的微波对设防区域以外的移动目标发生作用时,可能造成隔墙误报,安装这类探头时应认真选择安装位置,避免误报

指示灯和输出状态说明
传感器没有检测到移动物体,模块上的LED保持熄灭状态;当传感器检测到移动物体时,模块上的LED灯会被点亮,输出电平会由高电平变成低电平。约0.5s后模块LED会自动熄灭,输出电平由低电平变成高电平。若检测到持续移动的物体,模块的LED会一直闪烁,输出电平会一直高低变化,直到物体不再移动。
距离调整说明
本传感器具有2-16m范围连续可调,电位器顺着MIN方向调节,探测距离减小;电位器逆着MIN方向调节,探测距离增大。
注意:电位器调节到最大方向为灵敏度最高,当出现检测灯闪烁不停时属正常现象,可将电位器往MIN方向旋转15°~45°左右视实际使用情况做调节即可。
使用教程
准备
- 硬件
- UNO x1
- 微波传感器模块 x1
- 3PIN数字信号线 x1
- 软件
- Arduino IDE 点击下载Arduino IDE
接线图

说明:安装时要让天线面朝着需要探测的区域
注意:本传感器具有2-16m范围连续可调,电位器顺着MIN方向调节,探测距离减小;电位器逆着MIN方向调节,探测距离增大。
样例代码
点击下载库文件arduino定时器库函数。如何安装库?
代码完成的功能:当微波传感器探测到有移动物体时,Arduino板的D13脚LED会被点亮,点亮2S后会自动熄灭,下次再探测到移动物体时,该LED会再次被点亮
/*!
 * @file  microwaveSensor.ino
 * @brief  This example reads temperature and humidity from SHT1x Humidity and Temperature Sensor.
 * @copyright  Copyright (c) 2010 DFRobot Co.Ltd (http://www.dfrobot.com)
 * @license  The MIT License (MIT)
 * @author  Loan <Loan.he@dfrobot.com>
 * @version  V1.0
 * @date  2015-7-30
 */

/***********Notice and Trouble shooting***************
  1.Connection and Diagram can be found here
<https://wiki.dfrobot.com.cn/_SKU_SEN0192__Microwave_sensor%E5%BE%AE%E6%B3%A2%E4%BC%A0%E6%84%9F%E5%99%A8%E6%A8%A1%E5%9D%97>
  2.This code is tested on Arduino Uno, Leonardo, Mega boards.
  3.arduino Timer library is created by jonoxer.
  See <https://www.dfrobot.com.cn/images/upload/File/SEN0192/20160112134309yy5nus.zip arduino Timer library> for details.
 ****************************************************/
#include <MsTimer2.h>           //Timer interrupt function
int pbIn = 0;                   // Define the interrupt PIN is 0, that is, digital pins 2
int ledOut = 13;
int count = 0;
volatile int state = LOW;       //Define ledOut, default is off

void setup()
{
  Serial.begin(9600);
  pinMode(ledOut, OUTPUT);
  attachInterrupt(pbIn, stateChange, FALLING); // Sets the interrupt function, falling edge triggered interrupts.
  MsTimer2::set(1000, process); // Set the timer interrupt time 1000ms
  MsTimer2::start();//Timer interrupt start

}

void loop()
{
  Serial.println(count); // Printing times of 1000ms suspension
  delay(1);
  if (state == HIGH) //When moving objects are detected later, 2s shut down automatically after the ledout light is convenient.
  {
    delay(2000);
    state = LOW;
    digitalWrite(ledOut, state);    //Turn off led
  }

}


void stateChange()  //Interrupt function
{
  count++;

}

void process()   //Timer handler
{
  if (count > 1) //1000ms interrupt number greater than 1 is considered detected a moving object (this value can be adjusted according to the actual situation, equivalent to adjust the detection threshold of the speed of a moving object)
  {
    state = HIGH;
    digitalWrite(ledOut, state);    //Lighting led
    count = 0; //Count zero

  }
  else
    count = 0; //In 1000ms, interrupts does not reach set threshold value is considered not detect moving objects, interrupt the count number is cleared to zero.
}
常见问题
还没有客户对此产品有任何问题,欢迎通过qq或者论坛联系我们!
更多问题及有趣的应用,可以 访问论坛 进行查阅或发帖!
