简介
科技作为一种新美学,一直以来都难以被传统时尚界接受。谈到科技,总给人留下一种“怪咖”、“宅”的负面印象。此款产品将作为科技时尚的翻身之作,给你带来真正的科技美学。
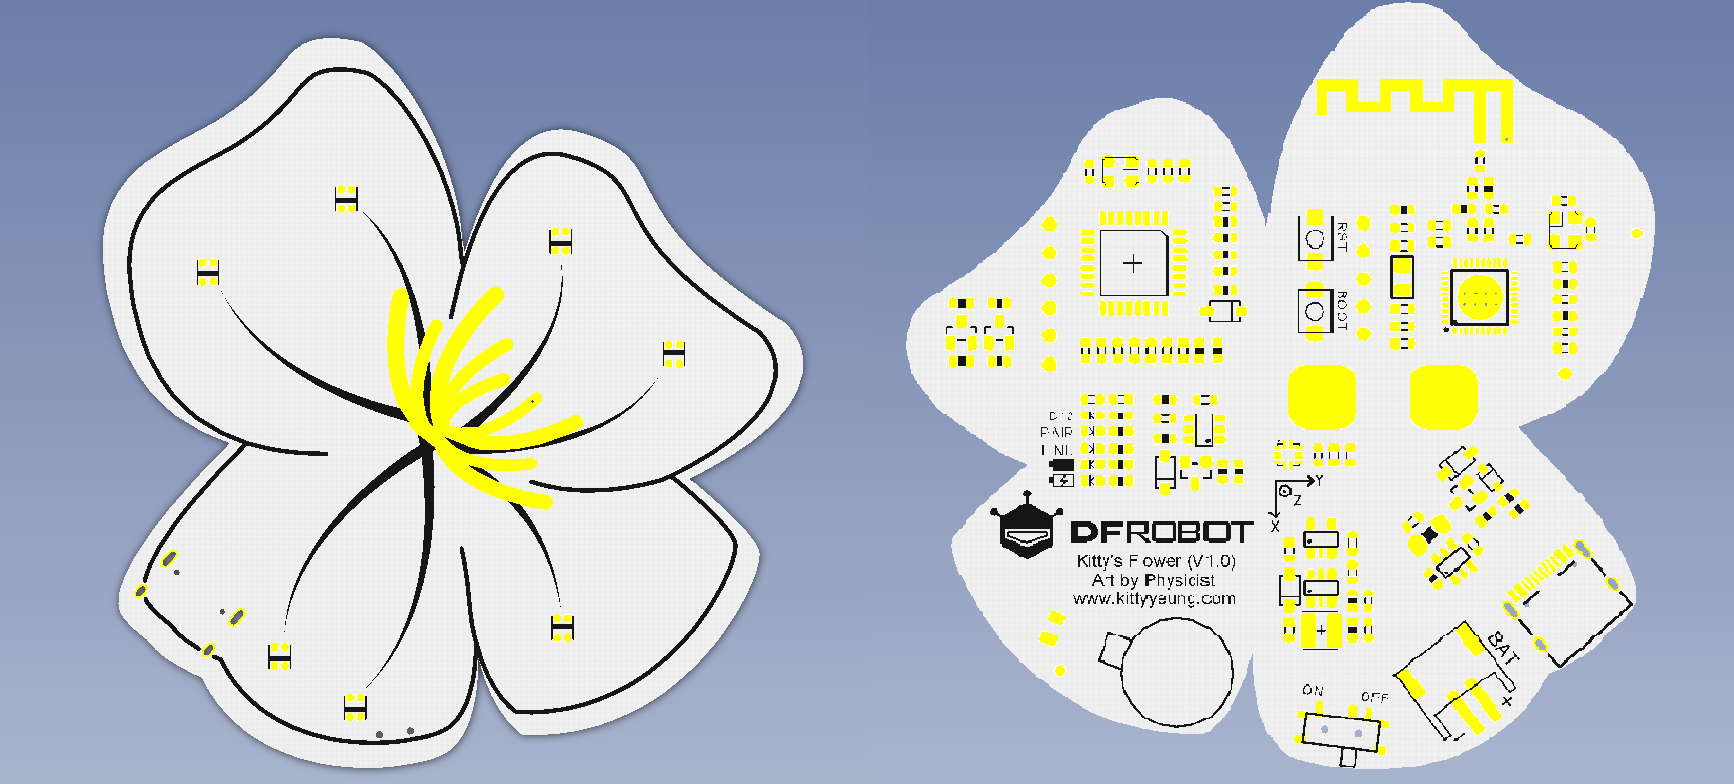
Kitty’s Flower是一款蓝牙可穿戴控制器,由设计师Kitty Yeung和DFRobot联合打造,专为可穿戴应用场景设计,集成充电电源管理系统、RGB LED灯、加速度传感器、震动、触摸等硬件外设,支持Arduino和Scratch编程,可以作为可穿戴产品、交互艺术装置、新时装、新饰品上的核心智能控制单元。
技术规格
- 微控制器:ATmega328
- BLE芯片类型:TI CC2540
- 支持蓝牙HID
- 支持通过AT指令调试蓝牙模组
- 通过串口的透明通信
- USB升级BLE固件
- 供电接口:USB/3.7V锂电池
- 外部供电范围:7-12V
- Bootloader:Arduino UNO
- 尺寸:70mm*70mm
- 重量: 30g
引脚说明

| 标号 | 名称 | 功能描述 |
|---|---|---|
| 1 | 震动马达 | D5 |
| 2 | 触摸 | D6 |
| 3 | RGB LED | D9 |
| 4 | LIS2DH 三轴加速度计 | I2C |
使用教程
Kitty Flower集成多种功能,我们会在下方一一展示,但是实际使用中,请将Kitty Flowers分别烧录: KittyMother和KittyChild两个Demo即可完成配对和连接。两个Demo会自动设置主板的主/从机状态,然后读取蓝牙RSSI场强数值,从而判断相互间的距离。点击下载Kitty's Flower Demo分别烧录代码。以下是各功能的使用方法:
准备
- 硬件
- 1 x Kitty's Flower
- 软件
- Arduino IDE 点击下载Arduino IDE
震动马达样例代码
#define VMPIN      5     //Vibration motor pin

void setup() {
  // initialize digital pin LED_BUILTIN as an output.
  pinMode(VMPIN, OUTPUT);
}

// the loop function runs over and over again forever
void loop() {
  digitalWrite(VMPIN, HIGH);   // turn the Motor on (HIGH is the voltage level)
  delay(1000);                       // wait for a second
  digitalWrite(VMPIN, LOW);    // turn the Motor off by making the voltage LOW
  delay(1000);                       // wait for a second
}
震动电机会反复一震一停
触摸样例代码
#define TOUCHPIN   6

void setup() {
  // initialize serial communication at 9600 bits per second:
  Serial.begin(115200);
  // make the pushbutton's pin an input:
  pinMode(TOUCHPIN, INPUT);
}

// the loop routine runs over and over again forever:
void loop() {
  // read the input pin:
  int touchState = digitalRead(TOUCHPIN);
  // print out the state of the button:
  Serial.println(touchState);
  delay(10);        // delay in between reads for stability
}
打开串口,触摸花蕊,串口输出高电平;反之输出低电平
RGB LED样例代码
  #include <Adafruit_NeoPixel.h>

    #define PIN 9     //The signal pin connected with Arduino
    #define LED_COUNT 60 // the amount of the leds of your strip

    // Create an instance of the Adafruit_NeoPixel class called "leds".
    // That'll be what we refer to from here on...
    Adafruit_NeoPixel leds = Adafruit_NeoPixel(LED_COUNT, PIN, NEO_GRB + NEO_KHZ800);

    void setup()
    {
      leds.begin();  // Call this to start up the LED strip.
      clearLEDs();   // This function, defined below, turns all LEDs off...
      leds.show();   // ...but the LEDs don't actually update until you call this.
    }

    void loop()
    {
        for (int i=0; i<LED_COUNT; i++)
      {
        rainbow(i);
        delay(10);  // Delay between rainbow slides
      }
    }


    // Sets all LEDs to off, but DOES NOT update the display;
    // call leds.show() to actually turn them off after this.
    void clearLEDs()
    {
      for (int i=0; i<LED_COUNT; i++)
      {
        leds.setPixelColor(i, 0);
      }
    }

    // Prints a rainbow on the ENTIRE LED strip.
    //  The rainbow begins at a specified position.
    // ROY G BIV!
    void rainbow(byte startPosition)
    {
      // Need to scale our rainbow. We want a variety of colors, even if there
      // are just 10 or so pixels.
      int rainbowScale = 192 / LED_COUNT;

      // Next we setup each pixel with the right color
      for (int i=0; i<LED_COUNT; i++)
      {
        // There are 192 total colors we can get out of the rainbowOrder function.
        // It'll return a color between red->orange->green->...->violet for 0-191.
        leds.setPixelColor(i, rainbowOrder((rainbowScale * (i + startPosition)) % 192));
      }
      // Finally, actually turn the LEDs on:
      leds.show();
    }

    // Input a value 0 to 191 to get a color value.
    // The colors are a transition red->yellow->green->aqua->blue->fuchsia->red...
    //  Adapted from Wheel function in the Adafruit_NeoPixel library example sketch
    uint32_t rainbowOrder(byte position)
    {
      // 6 total zones of color change:
      if (position < 31)  // Red -> Yellow (Red = FF, blue = 0, green goes 00-FF)
      {
        return leds.Color(0xFF, position * 8, 0);
      }
      else if (position < 63)  // Yellow -> Green (Green = FF, blue = 0, red goes FF->00)
      {
        position -= 31;
        return leds.Color(0xFF - position * 8, 0xFF, 0);
      }
      else if (position < 95)  // Green->Aqua (Green = FF, red = 0, blue goes 00->FF)
      {
        position -= 63;
        return leds.Color(0, 0xFF, position * 8);
      }
      else if (position < 127)  // Aqua->Blue (Blue = FF, red = 0, green goes FF->00)
      {
        position -= 95;
        return leds.Color(0, 0xFF - position * 8, 0xFF);
      }
      else if (position < 159)  // Blue->Fuchsia (Blue = FF, green = 0, red goes 00->FF)
      {
        position -= 127;
        return leds.Color(position * 8, 0, 0xFF);
      }
      else  //160 <position< 191   Fuchsia->Red (Red = FF, green = 0, blue goes FF->00)
      {
        position -= 159;
        return leds.Color(0xFF, 0x00, 0xFF - position * 8);
      }
    }
加速度代码
#include <Wire.h>
#include <DFRobot_LIS2DH12.h>

DFRobot_LIS2DH12 LIS; //Accelerometer

void setup() {
  Wire.begin();
  Serial.begin(115200);
  while (!Serial);
  delay(100);

  // Set measurement range
  // Ga: LIS2DH12_RANGE_2GA
  // Ga: LIS2DH12_RANGE_4GA
  // Ga: LIS2DH12_RANGE_8GA
  // Ga: LIS2DH12_RANGE_16GA
  while (LIS.init(LIS2DH12_RANGE_16GA) == -1) { //Equipment connection exception or I2C address error
    Serial.println("No I2C devices found");
    delay(1000);
  }
}

void loop() {
  acceleration();
}

/*!
    @brief Print the position result.
*/
void acceleration(void)
{
  int16_t x, y, z;

  delay(100);
  LIS.readXYZ(x, y, z);
  LIS.mgScale(x, y, z);
  Serial.print("Acceleration x: "); //print acceleration
  Serial.print(x);
  Serial.print(" mg \ty: ");
  Serial.print(y);
  Serial.print(" mg \tz: ");
  Serial.print(z);
  Serial.println(" mg");
}
结果
常见问题
还没有客户对此产品有任何问题,欢迎通过qq或者论坛联系我们!
更多问题及有趣的应用,可以 访问论坛 进行查阅或发帖。


