简介
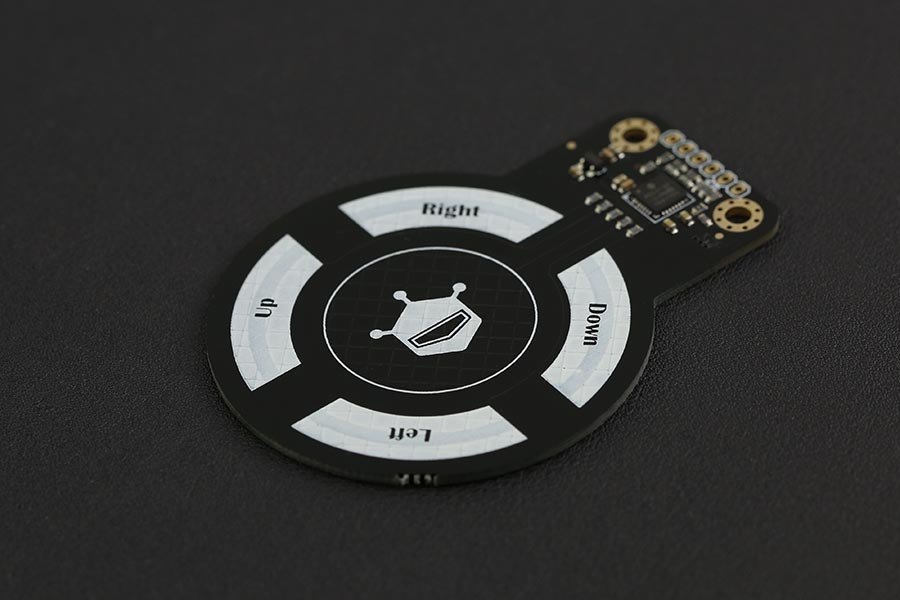
DFRobot 3D手势识别传感器是一款集成3D手势识别和运动跟踪为一体的交互式传感器,传感器可以在有效范围内识别手指的顺时针/逆时针转动方向和手指的运动方向等。传感器基于Microchip专利的GestIC®技术,采用电近场传感技术,包括了开发3D手势输入传感系统所有的块图,具有先进的3D信号处理单元,有效检测距离为0~10 cm。传感器可以应用于各类互动交互艺术产品,试想一下,挥一挥手,打开台灯,挥一挥手,打开音乐。一切尽在弹指间。
产品参数
- 工作电压:3.3-5V
- 接口类型:I2C
- I2C地址:0x42
- 手势感应:5cm
- 距离感应:10cm
- 尺寸:72*54 mm
- 工作温度范围:-20℃ ~ +85℃
- 空间分辨率:150 dpi
引脚说明

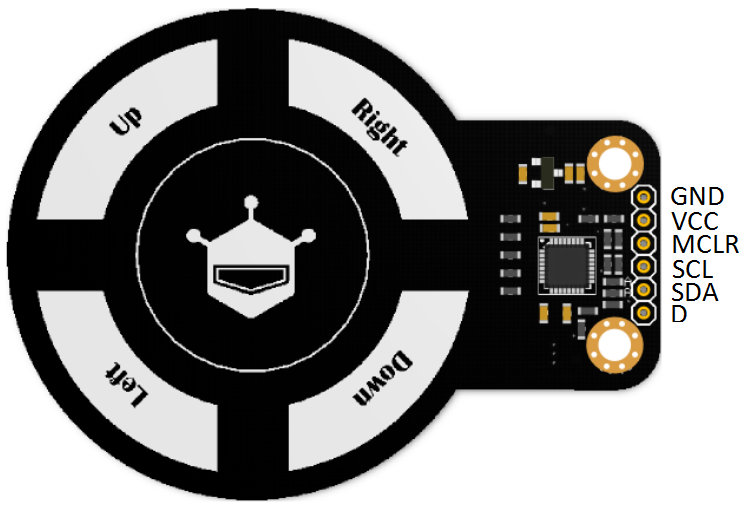
3D手势识别传感器引脚介绍
| 标号 | 名称 | 功能描述 |
|---|---|---|
| 1 | GND | 电源负极 |
| 2 | VCC | 电源正极(5V) |
| 3 | MCLR | 传感器复位(低电平有效) |
| 4 | SCL | I2C时钟信号 |
| 5 | SDA | I2C数据信号 |
| 6 | D | 数字IO口 |
传感器地址:0x42
使用教程
准备
- 硬件
- UNO x1
- 3D手势识别传感器 x1
- 杜邦线 若干
- 软件
- Arduino IDE 点击下载Arduino IDE
接线图
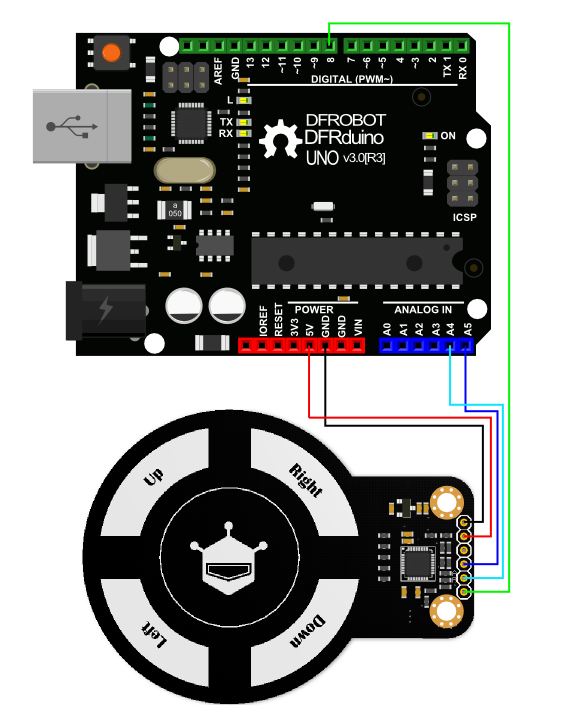
准备好硬件后,按照下图将模块与UNO连接好

样例代码
点击下载库文件例程和库文件 如何安装库? 代码功能:实现上下左右和手指顺时针和逆时针画圈手势识别。
/*!
 * @file gesture.ino
 * @brief gesture recognition, it can be up-->down,down-->up,left-->right,right-->left,Circle clockwise,Circle counterclockwise.
 * @n Hardware Connections:
 * @n HOST Pin    SENSOR PIN        Function
 * @n  GND          GND              Ground
 * @n  3.3V-5V      VCC              Power
 * @n  SCL          SCL              I2C Clock
 * @n  SDA          SDA              I2C Data
 * @n  DPin         D                Transfer Status Line
 * @n  MCLRPin      MCLR             reset
 * @copyright Copyright (c) 2010 DFRobot Co.Ltd (https://www.dfrobot.com)
 * @license The MIT License (MIT)
 * @author [yangfeng]<feng.yang@dfrobot.com>
 * @version V1.0
 * @date 2021-09-18
 * @url  https://github.com/DFRobot/DFRobot_MGC3130
 */
#include <DFRobot_MGC3130.h>

//the following pins are recommended, can be customized by the users (pins with input and output functions are required)
#if defined(ESP32) || defined(ESP8266)
  uint8_t DPin= D9;
  uint8_t MCLRPin= D3;
#elif defined(ARDUINO_SAM_ZERO)
  uint8_t DPin= 6;
  uint8_t MCLRPin= 7;
#else
  uint8_t DPin= 8;
  uint8_t MCLRPin= 9;
#endif

DFRobot_MGC3130 myGesture(DPin,MCLRPin);

void setup()
{

  Serial.begin(115200);
  /**
   *  initialization function,return true if initialization succeeds, and false if initialization fails
   */
  while(!myGesture.begin()){
    Serial.println("begin error! Please check whether the connection is correct");
    delay(100);
  };
  Serial.println("begin success!!!");

  /**
   *  turn off AirWheel function,returning -1 means the setup fails, and 0 means the setup succeeds
   */
  while(myGesture.disableAirWheel()!=0){
    delay(100);
  }
  /**
   *  enable gesture recognition function, returning -1 means the setup fails, and 0 means the setup succeeds
   */
  while(myGesture.enableGestures()!=0){
    delay(100);
  }

  Serial.println("config success!!!");
}


void loop()
{
  /**
   *  get the sensor data
   */
  myGesture.sensorDataRecv();

  /**
   *  get gesture information, gesture information:eFilckR/eFilckL/eFilckU/eFilckD/eCircleClockwise/eCircleCounterclockwise
   */
  switch(myGesture.getGestureInfo()){
    case myGesture.eFilckR:
      Serial.println("Flick Left to Right");
      break;
    case myGesture.eFilckL:
      Serial.println("Flick Right to Left");
      break;
    case myGesture.eFilckU:
      Serial.println("Flick Down to Up");
      break;
    case myGesture.eFilckD:
      Serial.println("Flick Up to Down");
      break;
    case myGesture.eCircleClockwise:
      Serial.println("Circle clockwise");
      break;
    case myGesture.eCircleCounterclockwise:
      Serial.println("Circle counterclockwise");
      break;
    default:
      break;
  }
}
Mind+(基于Scratch3.0)图形化编程
- 下载及安装软件。下载地址:https://www.mindplus.cc 详细教程:Mind+基础wiki教程-软件下载安装
- 切换到“上传模式”。 详细教程:Mind+基础wiki教程-上传模式编程流程
- “扩展”中选择“主控板”中的“Arduino Uno”。 "扩展"“传感器”中搜索选择“3D手势传感器”。详细教程:Mind+基础wiki教程-加载扩展库流程
- 进行编程,程序如下图:
- 菜单“连接设备”,“上传到设备”
- 程序上传完毕后,打开串口即可看到数据输出。详细教程:Mind+基础wiki教程-串口打印

结果
当用手上下左右移动及顺时针逆时针画圈时,串口输出相应的字符串。
常见问题
还没有客户对此产品有任何问题,欢迎通过qq或者论坛联系我们!
更多问题及有趣的应用,可以 访问论坛 进行查阅或发帖!

