简介
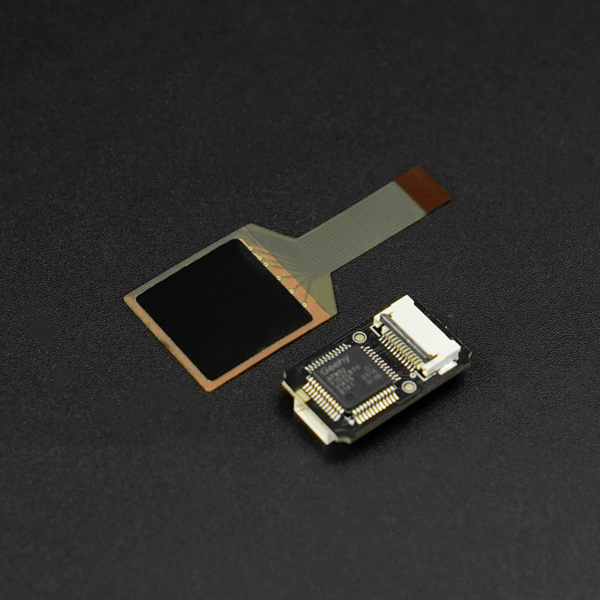
这款 6×6 柔性阵列压力传感器是专为智能夹持系统、人机交互及科研项目设计的触觉感知解决方案。它采用先进的柔性薄膜技术,在仅 15×15mm 的感应区域内集成了 36个独立检测单元 ,能够实时捕捉接触点的压力分布与细微变化。
不同于传统的单点压力传感器,本产品支持 UART 接口级联,极大地简化了多传感器布线的复杂度。其超薄、可弯曲的特性,使其如同“电子皮肤”一般,能轻松贴合在机械手爪、可穿戴设备或DIY灵巧手上。通过配套的上位机软件Tactile Sensor Tool和完善的嵌入式软件支持,开发者可以快速完成项目验证。
产品特性
- 阵列式触觉:精准捕捉压力分布
- 极致小巧:无感嵌入各类项目
- UART 级联与易用性:快速上手验证
- 柔性 FPC 材质:耐高温与高寿命
规格参数
- 工作电压:5V
- 采样频率:20/50HZ
- 感测区域:15*15mm
- 阵列配置:6x6
- 通信接口:UART
- 触发力:20g
- 压力范围:20g~5kg(单感应点)
- 压力类型:按压
- 耐用性:>100万次(1kg力)
- 工作温度:-20℃ ~ +65℃
- 转接板尺寸:20*12mm
引脚说明
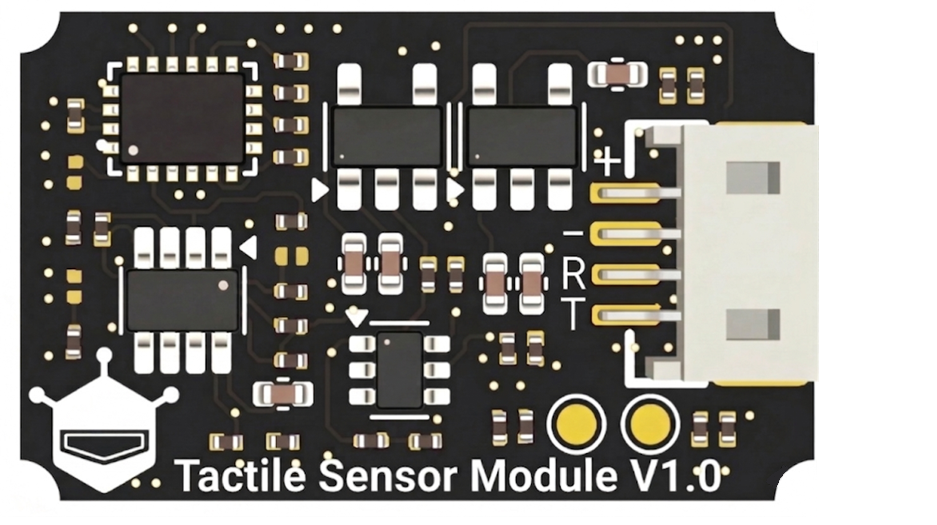
| 引脚 | 功能描述 |
|---|---|
| + | DC 5V输入 |
| ﹣ | 接地 |
| RX | 传感器串口接收 |
| TX | 传感器串口发送 |
上位机
硬件准备
- 串口模块 (SKU:FIT0781) ×1
- 6×6 柔性阵列式触觉压力传感器(SKU:SEN0704)×1
上位机准备
- 下载DFTactileSensorTool上位机: 点击下载DFTactileSensorTool
接线图
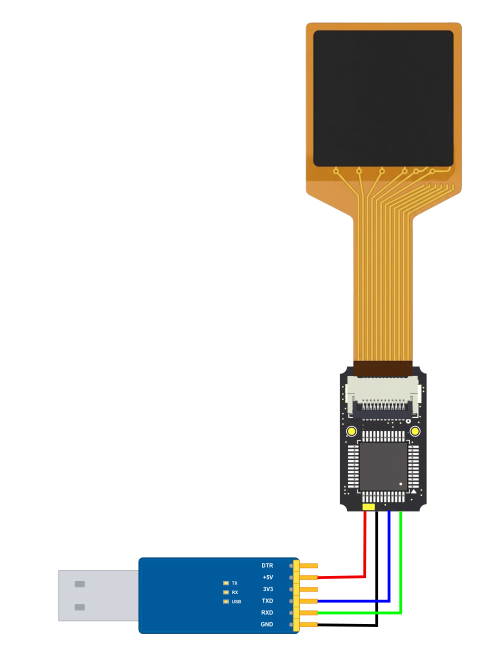
示例图
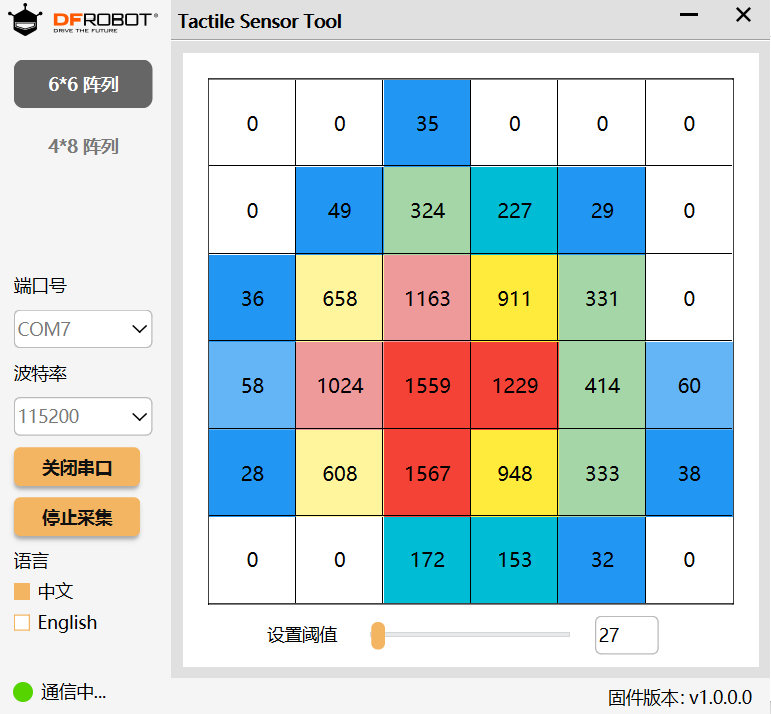
- 打开串口,点击开始采集
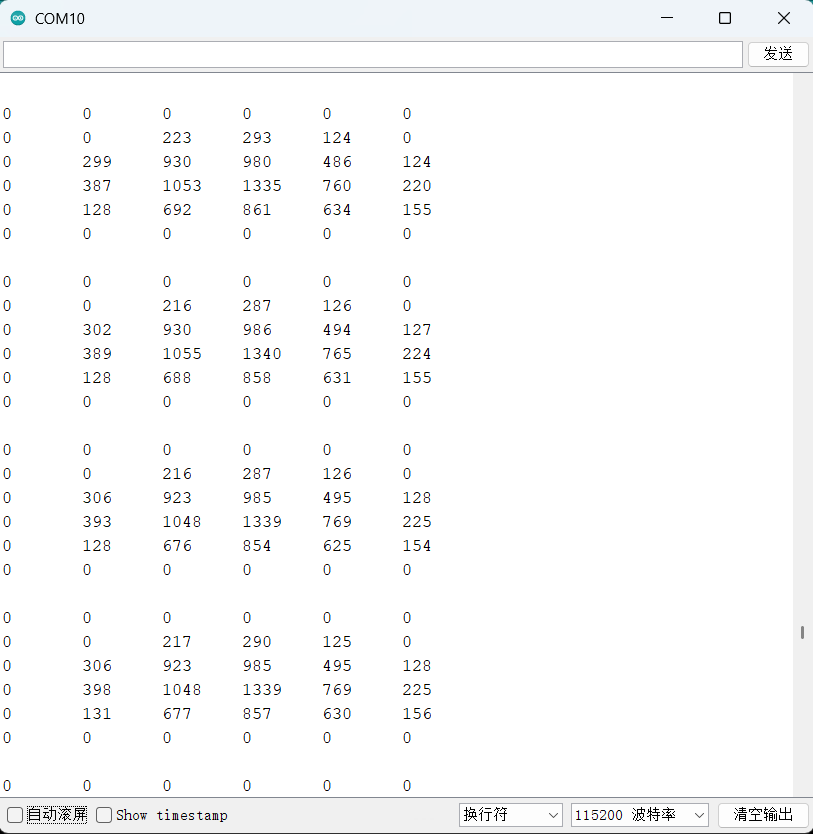
- 用手指按压压力传感器,串口监视器的数据会随按压力度大小、位置发生相应变化
使用教程
硬件准备
- DFRobot Leonardo (SKU:DFR0221) ×1
- 6×6 柔性阵列式触觉压力传感器(SKU:SEN0704)×1
软件准备
- 下载Arduino IDE: 点击下载Arduino IDE
- 下载TactileSensor库: 点击下载DFRobot_TactileSensor
- 有关如何安装库文件,请点击链接
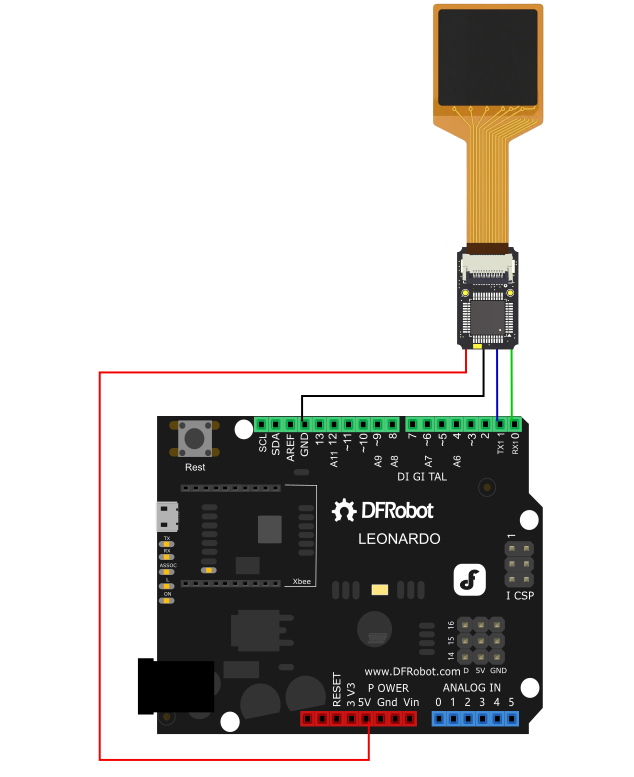
接线图
示例代码
- 烧录以下示例代码通过串口监视器查看数值
/*!
 * @file getTactileData.ino
 * @brief This is an example to show how to get tactile data from DFRobot Tactile Sensor.
 * @copyright	Copyright (c) 2025 DFRobot Co.Ltd (http://www.dfrobot.com)
 * @license The MIT License (MIT)
 * @author [JiaLi](zhixinliu@dfrobot.com)
 * @version V1.0.0
 * @date 2025-09-04
 * @url https://github.com/DFRobot/DFRobot_TactileSensor.git
 */
#include "DFRobot_TactileSensor.h"

/* ---------------------------------------------------------------------------------------------------------------------
 *    board   |             MCU                | Leonardo/Mega2560/M0 |    UNO    | ESP8266 | ESP32 |  microbit  |   m0  |
 *     VCC    |              5V                |        VCC           |    VCC    |   VCC   |  VCC  |     X      |  vcc  |
 *     GND    |              GND               |        GND           |    GND    |   GND   |  GND  |     X      |  gnd  |
 *     RX     |              TX                |     Serial1 TX1      |     5     |   5/D6  |  D2   |     X      |  tx1  |
 *     TX     |              RX                |     Serial1 RX1      |     4     |   4/D7  |  D3   |     X      |  rx1  |
 * ----------------------------------------------------------------------------------------------------------------------*/
/*The default baud rate is 115200, and it supports 9600,57600, and 912600*/

//#define DFRobot_TACTILE_ARRAY_SIZE 32    // if you use (4*8)32-channel tactile sensor
#define DFRobot_TACTILE_ARRAY_SIZE 36  // if you use (6*6)36-channel tactile sensor

#define ADDRESS 1    // sensor address

#if defined(ARDUINO_AVR_UNO) || defined(ESP8266)
SoftwareSerial        mySerial(/*rx =*/4, /*tx =*/5);
DFRobot_TactileSensor tactile(/*addr =*/ADDRESS, /*s =*/&mySerial);
#else
DFRobot_TactileSensor tactile(/*addr =*/ADDRESS, /*s =*/&Serial1);
#endif

void setup()
{
  //Init MCU communication serial port
#if defined(ARDUINO_AVR_UNO) || defined(ESP8266)
  mySerial.begin(115200);
#elif defined(ESP32)
  Serial1.begin(115200, SERIAL_8N1, /*rx =*/D3, /*tx =*/D2);
#else
  Serial1.begin(115200);
#endif

  Serial.begin(115200);
  while (tactile.begin(DFRobot_TACTILE_ARRAY_SIZE) == -1) {
    Serial.println(" Sensor initialize failed,please check whether the sensor model or connection is correct!");
    delay(1000);
  }
  Serial.println(" Sensor  initialize success!");

  sVersionInfo_t ver;

  //Get device information
  ver = tactile.getDeviceInfo();
  Serial.print(" VID: ");
  Serial.println(ver.VID);
  Serial.print(" PID: ");
  Serial.println(ver.PID);
  Serial.print(" Version: ");
  Serial.println(ver.version, HEX);
  delay(1000);

  //Set threshold value,the range is 0-4095
  tactile.setThld(50);

  //The sensor returns to its default value
  //note: restoreSensor will reset the sensor threshold、address、uart and sample rate to default value
  //tactile.restoreSensor();

  //Set device address,the address range is 1 to 255,0 is broadcast address,not writable.
  //tactile.setDevAddr(1);

  //set uart baudrate,default is 115200,
  //After setting, please modify the uart of the driving sensor to the corresponding baudrate,stop bits and parity.
  //tactile.setBaudrate(eBaudrate115200,eStopBit1,eParityNone);

  tactile.setSampleRate(eSampleRate20Hz);
  //setSampleRate(eSampleRate50Hz);
  //set sample frequency, 20Hz or 50Hz
}

void loop()
{
  sAdcDatas_t adcDatas;
  //Get tactile data
  adcDatas = tactile.getDatas();
  //Print tactile data
  if (adcDatas.result == 0) {
    for (int i = 0; i < tactileSensorArrayY; i++) {
      for (int j = 0; j < tactileSensorArrayX; j++) {
        Serial.print(adcDatas.adcval[i][j]);
        Serial.print("\t");
      }
      Serial.println();
    }
  } else {
    Serial.println("Read ADC data failed!!");
  }
  Serial.println();
  delay(20);
}