概述
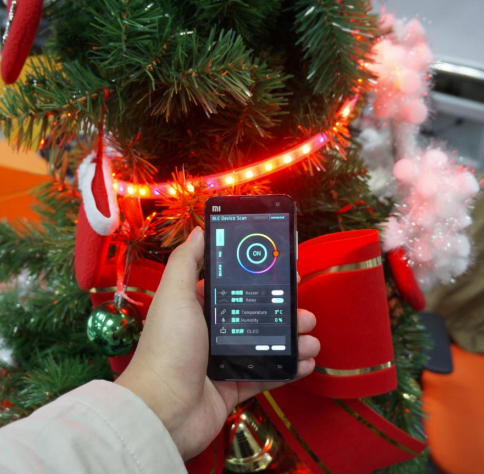
快到圣诞节了!厌倦了无聊的旧圣诞树灯?为什么不为您的圣诞树使用我们的RGB LED灯?
DFRobot RGB LED灯带长3米,包括一个硅橡胶防水外壳,可以切成任意长度。灯带中的每个LED均可单独寻址,并与我们的Bluno微控制器结合使用,您可以使用支持蓝牙4.0的设备对其进行控制,从而可以控制灯带中每个LED的颜色和顺序。
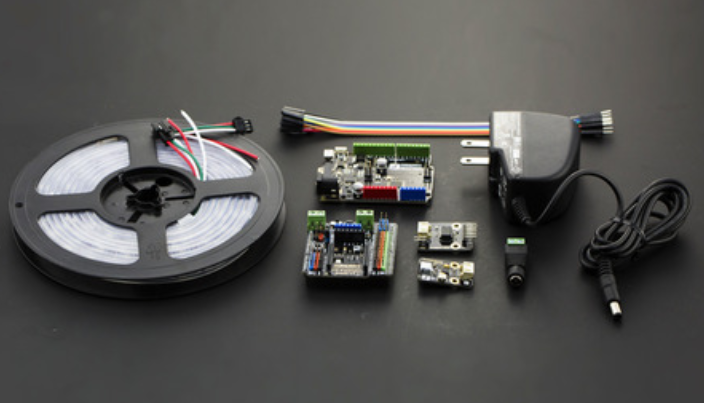
配送清单
所有这些硬件都包含在KIT0069中。您可以通过以下Wiki链接找到有关每个硬件的详细硬件信息。
-
直流电源(5V@3.6A)
产品简介
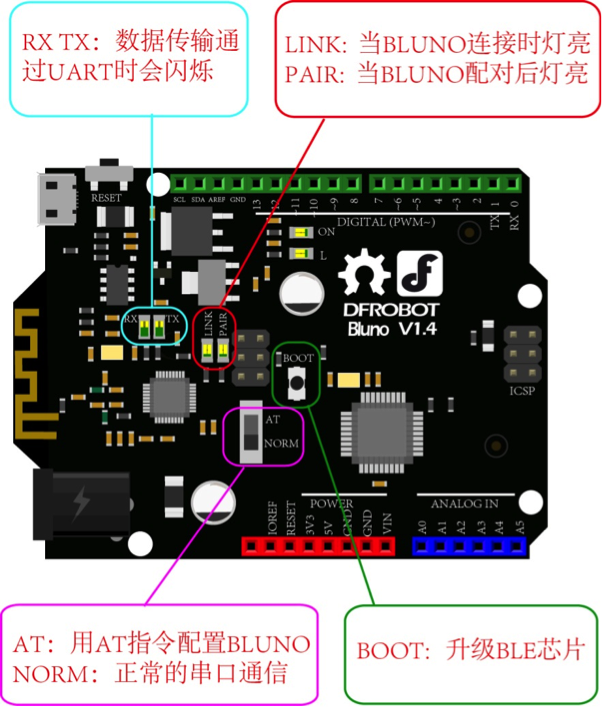
Bluno是基于Arduino UNO的板,集成了TICC2540蓝牙4.0芯片。它与Android 4.3+或IOS 7.0+设备兼容。蓝牙功能允许:通过BLE进行无线编程
- 蓝牙HID支持
- 用于BLE配置/固件上传的AT命令
因为Bluno基于Arduino UNO,所以它与所有Arduino UNO引脚兼容。如果您将基于Arduino UNO的项目换成Bluno开发板,则您的Arduino项目可以无线化!
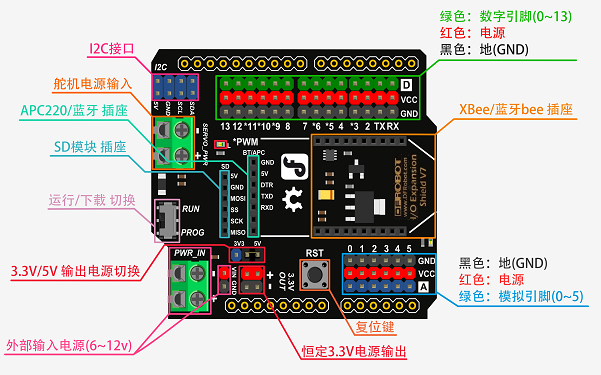
这是Arduino UNO的扩展板。它与Bluno,Mega2560或Romeo板兼容。对于该项目,它将为我们提供额外的I / O引脚,以连接RGB LED灯条和声音传感器。
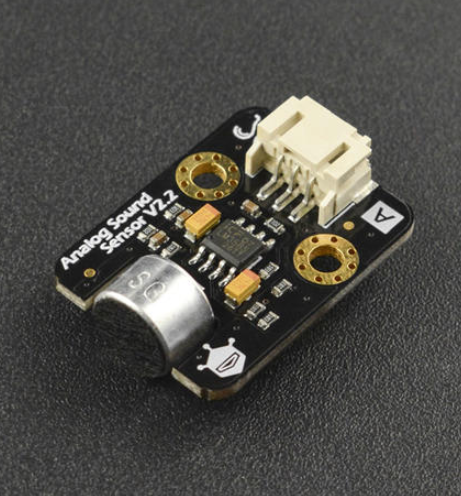
模拟声音传感器用于测量声音强度,其输出可以用 Arduino 或其它设备捕
获经过处理得到想要的数据。比如可以用这个实现声控门或音乐互动。
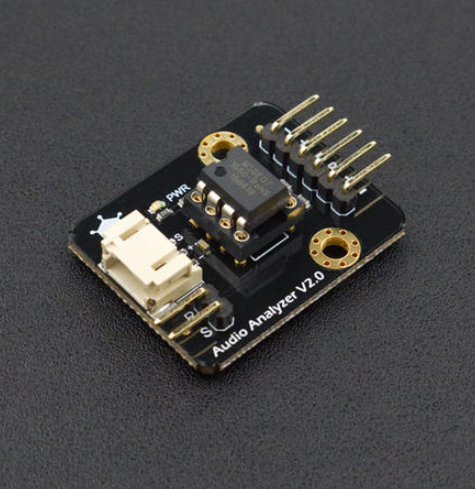
这是一个 MSGE07 的小模块,用于提取信号中不同频率下的信号强度。加
上上面的声音传感器,可以很容易地实现频谱分析,该模块支持 7 个频率下的
信号强度提取,分别为 63Hz, 160Hz, 400Hz, 1kHz, 2.5kHz, 6.25kHz 和
16kHz, 模块可用于声音的频谱采集等。
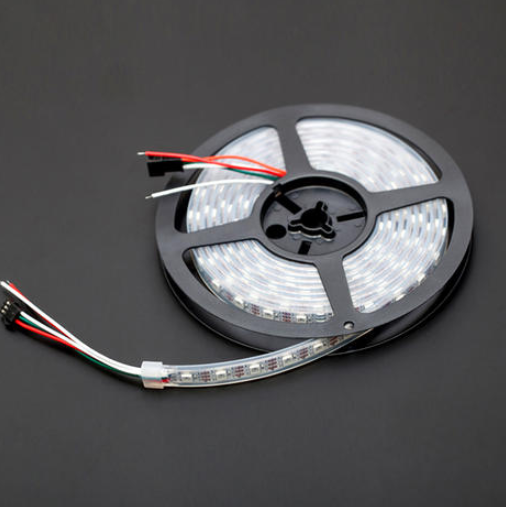
这是一款内置了芯片的 LED 灯带,所以你可以单独的控制灯带里的每一个
灯!每米的灯带总共有 60 颗灯珠,所以在灯光效果上可以做到很美妙。控制方
面,灯带支持 3.3-5V 的控制电压,这一点保证了兼容性上的宽范围。
电路连接图
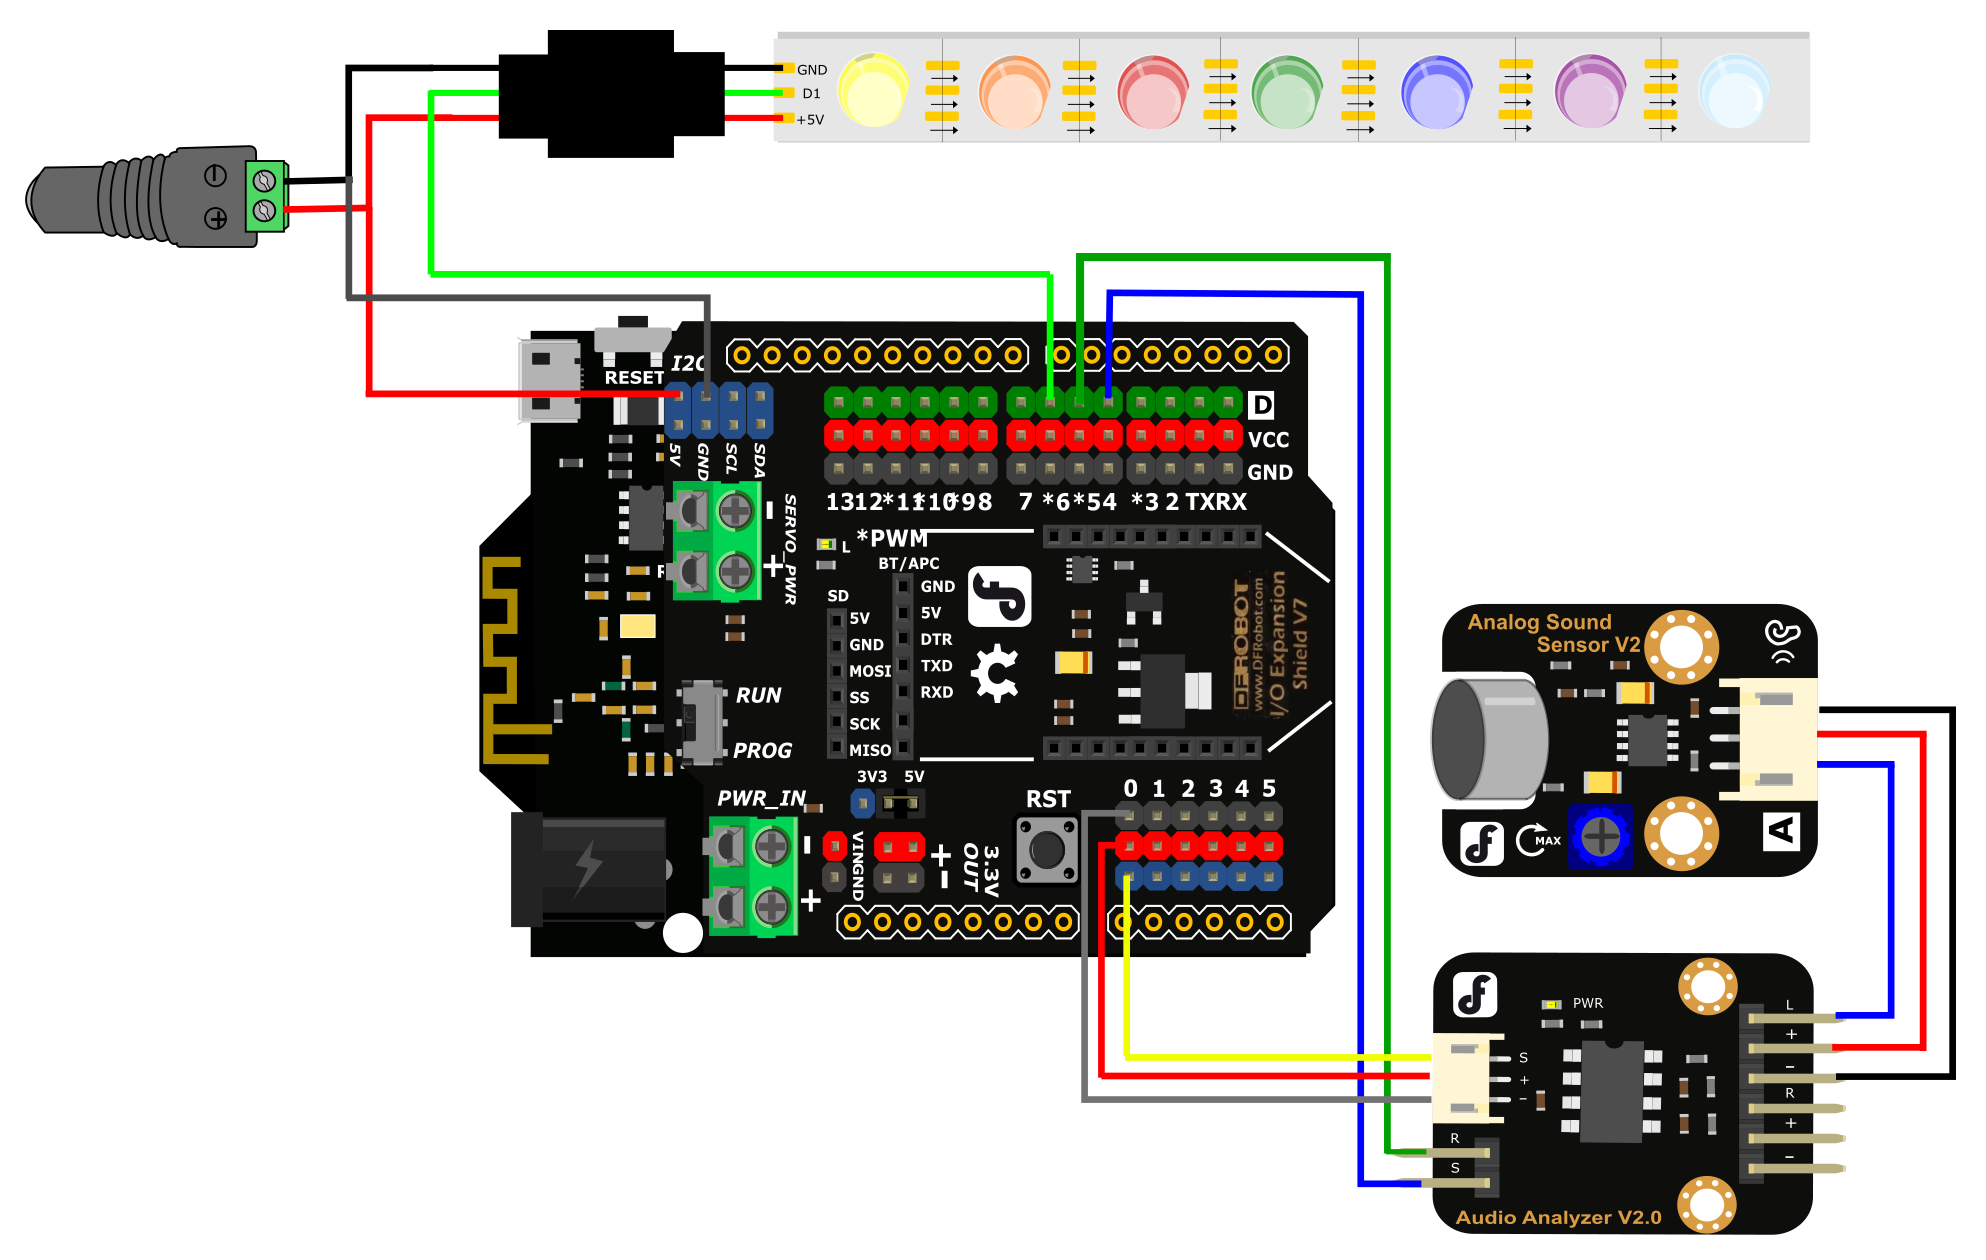
5V @ 3A来自外部电源,通过连接器连接至Bluno和LED灯带。使用跳线将LED灯条的数字信号由Bluno上的数字引脚6提供。
音频分析器模块的输出连接到Bluno的模拟0引脚。连接器随模块一起提供。确保**+,-和s**引脚正确对齐,否则电路将不起作用。使用跳线讲音频分析仪上的S连接到数字引脚4。使用跳线音频分析仪上的RST连接到数字引脚5。
模拟声音传感器模块通过提供的连接器连接到音频分析器模块。将音频分析仪的左声道信号(L),+和-连接到模拟声音传感器。确保**+,-和s**引脚正确对齐,否则电路将不起作用。
Arduino 样例程序
确保从产品页面下载并安装库,并将它们安装在正确的目录中,否则示例程序将无法编译!在Windows上,默认目录为C:\ Users \ Documents \ Arduino \ libraries
需要将以下库提取到Arduino IDE库目录中:
注意:如果 Arduino IDE库包含在嵌套文件夹中,则它们无法识别。检查每个库目录是否在单个文件夹中包含所有必需的文件。如果库文件位于库目录的嵌套文件夹中,则在编译草图时会出现编译错误,因为Arduino IDE将无法找到您的库!
/*
The library "Adafruit_NeoPixel.h" is download from www.adafruit.com
You can change the data in the array "color[]" to change the color which changes when songs playing
and the data in color[] can be find in "WS2812_Definitions.h" which is also download from www.adafruit.com
*/

#include <Adafruit_NeoPixel.h>
#include "WS2812_Definitions.h"
#include <avr/pgmspace.h>
#include <Wire.h>
#include "Arduino.h"
#include "PlainProtocol.h"
#include <Metro.h>
#include <AudioAnalyzer.h>

#define PIN 6             //Arduino Pin connect to the LED Strip
#define LED_COUNT 180     //set the Amount of LED to 180 and this number depend on how many you really have

PlainProtocol BLUNOPlainProtocol(Serial,115200);//set Serial baud rate to 115200
Adafruit_NeoPixel leds = Adafruit_NeoPixel(LED_COUNT, PIN, NEO_GRB + NEO_KHZ400);// NEO_GRB means the type of your LED Strip
Metro ledMetro = Metro(18);  // Metro for data receive in a regular time
Analyzer Audio = Analyzer(4,5,0); // Strobe->4 RST->5 Analog->0

int humid=0;
int temper=0;          //  humid and temper means nothing in this program,just for the software in your phone
int State01=2,State02=0;         //  the value will change when your press "BUZZER" in your phone
int Red=10,Green=0,Blue=10,Number_Position_RGB=100;//the value of RGB and the position of the LEDs
int FreqVal[7];//the spectrum value
int color[]={0xDC143C,0xFFA500,0xFFFF00, 0x32CD32,0x0000FF,0x2F4F4F,0x4B0082,0xDA70D6};

int Num_Channel=0,Buff_Channel=0;
int Num_Color[7],Buff_Num_Color[7];
boolean Dis_En=false;
int Num_First_Color=0,Buf_Max=0; //
int Num_Shark02_High=0,Number_Shark02_LOW=0;

void setup()
{
  Audio.Init();//Init module
  leds.begin();  // Call this to start up the LED strip.
  clearLEDs();   // This function, defined below, turns all LEDs off...
  leds.show();   // ...but the LEDs don't actually update until you call this.
  Serial.begin(115200);
  TCCR1B &= ~((1<<CS12)|(1<<CS11)|(1<<CS10));   //Clock select: SYSCLK divde 8;
  TCCR1B |= (1<<CS11);
  TCCR2B &= ~((1<<CS12)|(1<<CS11)|(1<<CS10));   //Clock select: SYSCLK divde 8;
  TCCR2B |= (1<<CS11);
}

void loop()
{
  temper=State01;
  humid=State02;
  if (BLUNOPlainProtocol.available())
  {
    if(BLUNOPlainProtocol.receivedCommand=="TEMP")          BLUNOPlainProtocol.write("TEMP", temper);
    else if(BLUNOPlainProtocol.receivedCommand=="HUMID")    BLUNOPlainProtocol.write("HUMID", humid);

    if (BLUNOPlainProtocol.receivedCommand=="BUZZER")          //get command of "BUZZER"
    {
      if(BLUNOPlainProtocol.receivedContent[0]==1)  State01=1;
      else                                          State01=2;
    }
    else if(BLUNOPlainProtocol.receivedCommand=="RGBLED")  //get command of  "RGB"
    {
      State01=3;
      Red  = BLUNOPlainProtocol.receivedContent[0];
      Green= BLUNOPlainProtocol.receivedContent[1];
      Blue = BLUNOPlainProtocol.receivedContent[2];
    }
  }

  if (ledMetro.check() == 1)//time for metro
  {
    if(State01==1)
    {
      clearLEDs();  // Turn off all LEDs
      leds.show();
    }
    else if(State01==2)
    {
        Rock_With_Song();//leds.show();
    }
    else if(State01==3)
    {
      for (int i=0;i<LED_COUNT;i++)
      {
        if(i%7==0)
          leds.setPixelColor(i,Red, Green, 0);//change the color
        else if(i%3==0)
          leds.setPixelColor(i,0, Green, Blue);//change the color
        else if(i%2==0)
          leds.setPixelColor(i,Red, Green, Blue);//change the color
        else
          leds.setPixelColor(i,Red,0, Blue);//change the color
      }
      leds.show();
    }
  }
}


void clearLEDs()
{
  for (int i=0; i<LED_COUNT; i++)  leds.setPixelColor(i, 0);
}

void rainbow(byte startPosition)
{
  int rainbowScale =  192/LED_COUNT;
  leds.setPixelColor( startPosition, rainbowOrder((rainbowScale * ( startPosition + startPosition)) % 192));
  leds.show();
}
uint32_t rainbowOrder(byte position)
{
  if (position < 31)  // Red -> Yellow (Red = FF, blue = 0, green goes 00-FF)
  {
    return leds.Color(0xFF, position * 8, 0);
  }
  else if (position < 63)  // Yellow -> Green (Green = FF, blue = 0, red goes FF->00)
  {
    position -= 31;
    return leds.Color(0xFF - position * 8, 0xFF, 0);
  }
  else if (position < 95)  // Green->Aqua (Green = FF, red = 0, blue goes 00->FF)
  {
    position -= 63;
    return leds.Color(0, 0xFF, position * 8);
  }
  else if (position < 127)  // Aqua->Blue (Blue = FF, red = 0, green goes FF->00)
  {
    position -= 95;
    return leds.Color(0, 0xFF - position * 8, 0xFF);
  }
  else if (position < 159)  // Blue->Fuchsia (Blue = FF, green = 0, red goes 00->FF)
  {
    position -= 127;
    return leds.Color(position * 8, 0, 0xFF);
  }
  else  //160 <position< 191   Fuchsia->Red (Red = FF, green = 0, blue goes FF->00)
  {
    position -= 159;
    return leds.Color(0xFF, 0x00, 0xFF - position * 8);
  }
}


void Rock_With_Song()
{
  Buff_Channel=Num_Channel;// Buff_Channnel can store the number of the channel which has the max spectrum value
  Audio.ReadFreq(FreqVal);// get the spectrum value
  for (int i=0;i<6;i++)
  {
    if(FreqVal[Num_Channel]<FreqVal[i])  Num_Channel=i;// get the number of the channel which has the max spectrum value
    Buff_Num_Color[i]=Num_Color[i];                      //store the value for the using below
  }
  if(FreqVal[Num_Channel]<400)      {
    Number_Shark02_LOW++;
  } //count if a low voice started
  if(Buf_Max!=Num_Channel && FreqVal[Num_Channel]>300)    // judge if the sound changed
  {
    Num_First_Color++;
    Dis_En=true;                                          //enable the display
    if(FreqVal[Num_Channel]>400) Number_Shark02_LOW=0;    //reset the count of low voice
    if (Num_First_Color==7) Num_First_Color=0;                              //for recycle
    for(int i=0;i<7;i++)                                  //recycle the colour
    {
      int x=random(0,6);
      if(i==0)   Num_Color[i]=Num_First_Color;                  //recycle the value
      else       Num_Color[i]=Buff_Num_Color[x];       //change the color randomly
    }
  }

  Buf_Max=Num_Channel;                                   //store the max_value_channel for next use

  if( (Buf_Max==5 || Buf_Max==4 ) && FreqVal[Buf_Max]>700)  //count when the  High vlaue of the sound started
  {
    Num_Shark02_High++;
  }
  else Num_Shark02_High=0;                                  //reset the count of the High_value_count

  if(Num_Shark02_High>22)                                  //time of High value voice reached
  {
    for(int i=0;i<LED_COUNT/2;i++)                         //these are effects of color changing
    {
      leds.setPixelColor(i,rainbowOrder(i));               //rising from two origin points
      leds.setPixelColor(i+LED_COUNT/2,rainbowOrder(i));
      leds.show();
      if(i>LED_COUNT/4) delay(1);
    }
    for(int i=0;i<LED_COUNT/2;i++)
    {
      leds.setPixelColor(LED_COUNT-i,rainbowOrder(i));
      leds.setPixelColor(i+LED_COUNT/2,rainbowOrder(i));
      leds.show();
    }
    for (int i=0;i<LED_COUNT;i++)
    {
      leds.setPixelColor(i,GOLD);
    }
    leds.show();
    Audio.ReadFreq(FreqVal);
    if(FreqVal[4]>800)                                         //if High sound value continues, take another effect out!
    {
      for(int x=0;x<6;x++)
      {
        if(FreqVal[x]>1000)
        {
          for(int y=0;y<LED_COUNT/2;y++)    {
            leds.setPixelColor(LED_COUNT-y,RED);
            leds.setPixelColor(LED_COUNT/2-y,RED);
            leds.show();
          }
          x=7;
        }
      }
    }
    Num_Shark02_High=0;                                  //reset the count when effect playing finished
  }
  if(Number_Shark02_LOW>40)                             //when the time of low value sound reached
  {
    for(int i=0;i<LED_COUNT/2;i++)                       //close the light from two point
    {
      leds.setPixelColor(i,0);
      leds.setPixelColor(LED_COUNT-i,0);
      leds.show();
    }
    Number_Shark02_LOW=0;
    Dis_En=false;                                    //disable the function:Display() because the light should be closed
  }
  if(Dis_En==true)
    Display();
}

void Display()
{
  for (int i=0;i<LED_COUNT;i++)
  {
    if(i<LED_COUNT/7)
    {
      leds.setPixelColor(i,color[Num_Color[0]]);
    }
    else if(i<(LED_COUNT/7)*2)   {
      leds.setPixelColor(i,color[Num_Color[1]]);
    }
    else if(i<(LED_COUNT/7)*3)   {
      leds.setPixelColor(i,color[Num_Color[2]]);
    }
    else if(i<(LED_COUNT/7)*4)   {
      leds.setPixelColor(i,color[Num_Color[3]]);
    }
    else if(i<(LED_COUNT/7)*5)   {
      leds.setPixelColor(i,color[Num_Color[4]]);
    }
    else if(i<(LED_COUNT/7)*6)   {
      leds.setPixelColor(i,color[Num_Color[5]]);
    }
    else if(i<LED_COUNT)         {
      leds.setPixelColor(i,color[Num_Color[6]]);
    }
  }
  leds.show();
}
APP测试
在Arduino IDE中,按下验证按钮并检查代码是否可以编译。如果遇到编译错误,请检查是否正确安装了库。如果一切顺利,请继续并将代码上传到Bluno。上传代码后,请在音频传感器附近拍手或单击手指以检查是否触发。您会看到LED依次点亮。
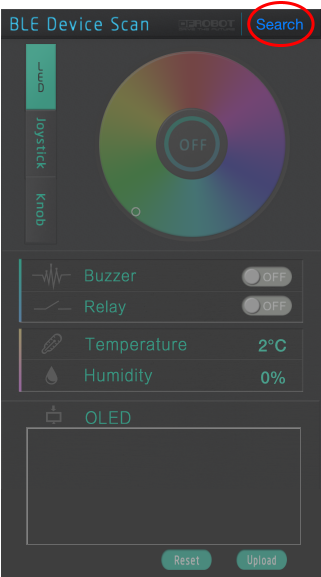
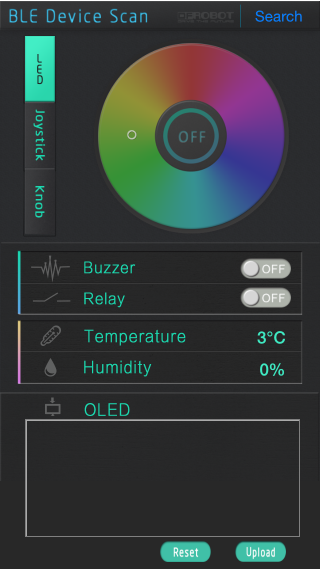
下一步是测试智能设备控制功能。在智能设备上打开Play BLUno。点击右上角的搜索。默认情况下,您的Bluno将显示为Bluno。(您可以根据需要使用AT命令更改设备名称- 此处有详细信息)
您的智能设备将扫描范围内的BLE设备。当您的设备出现时,选择它并配对。您现在有了灯光控制界面。使用颜色选择器选择灯光的颜色。
现在,您拥有自己的一套声控蓝牙圣诞灯!
熟悉程序后可以自己搭建自己喜欢的灯饰以配合不同场景。谢谢阅读!
常问问题
| Q1: | 点亮整个LED灯条所需的最短时间是多少? |
| A1: | 根据我们的测试,200个LED大约需要3毫秒。 |
| Q2: | 我的LED灯条昨天打开了,但是今天不亮。为什么? |
| A2: | 1)检查代码和电路连接 |
| 2)检查LED灯带是否有足够的功率(5V @ 3A,3米) | |
| 3)如果找不到解决方案,请找到连接到微控制器的灯带末端。从LED灯带的末端拆下-,+和s线,切断末端LED,然后将连接焊接到下一个LED。 | |
| Q3: | LED灯条是否容易折断? |
| A3: | 我们已经对此进行了多次测试,几乎没有问题。 |
