
简介
想过要把黄浦江边正旦国际大厦的广告牌搬回家吗?现在,64 x 32 RGB LED matrix panel可以帮你实现。这些面板常被用在一些广告墙,显示屏上。在大街小巷,我们都可以看到路边播放动画或短片的广告牌。想想是不是很酷呢?我们把它从工厂带来了这里。
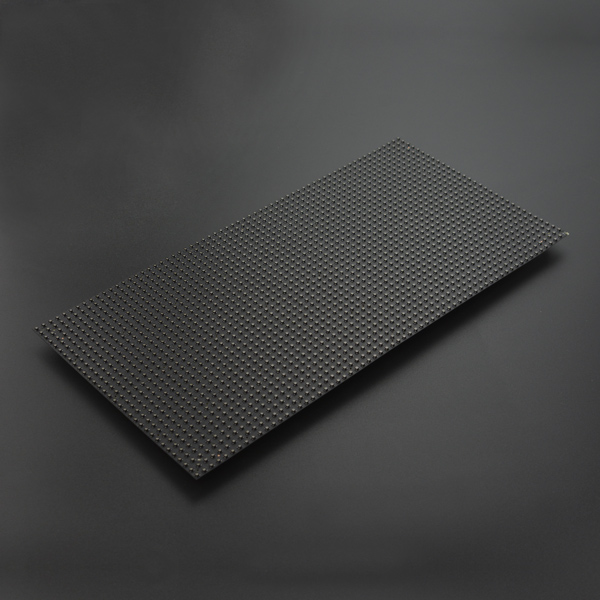
这个版本的LED 面板,不能用常规的Uno来驱动,因为它太大了!可以用mega,树莓派或者其他的设备来驱动这块RGB面板,因为有足够的RAM.它还是一款全彩、高亮度、寿命长、色彩纯正、无污染LED显示模组,室内室外均可使用,安全稳定,模块之间不会相互挤压变形,恶劣环境下也可以正常使用。 该屏分为硬屏和软屏两种类型 硬屏不可弯曲,灯间距为4mm。 软屏可在一定范围内弯曲,分为4mm间距和5mm间距两种。
该类型面板由2048个RGB led按照64X32网格组成。背后,有两个IDC连接器,一个输入,一个输出;12个16位锁存可以让你以1/16扫描驱动显示屏。面板需要用到13个IO 引脚(6个数据位,7个控制位),一个5V,输出高达4A的电源。更多资料请参考教程。
技术规格
DFR0460规格参数(硬屏)
- 驱动电压:DC 5V
- 平均功耗:小于500W/㎡
- 最大功耗:小于1000w/㎡
- 模组像素:64*32=2048 点
- 可视角度水平:≧160°
- 控制方式:同步控制
- 驱动方式:1/16扫描
- 换幁频率:≧60Hz
- 白平衡亮度:≧1200cd/㎡
- 刷新频率:≧300Hz
- 像素间距:4mm
- 模组尺寸:125mm*250mm
- 模组厚度:11mm
DFR0595规格参数(软屏)
- 工作电压:DC 5V
- 最大功耗:18W
- 模组像素:64*32=2048 点
- 可视角度:H:160°;V:160°
- 控制方式:同步控制
- 驱动方式:1/16扫描
- 换幁频率:60Hz
- 白平衡亮度:≧1000cd/㎡
- 刷新频率:≧300Hz
- 像素间距:4mm
- 模组尺寸:128mm*256mm
DFR0596规格参数(软屏)
- 工作电压:DC 5V
- 最大功耗:≤12W
- 模组像素:64*32=2048 点
- 可视角度:160°(水平)
- 控制方式:同步控制
- 驱动方式:1/16扫描
- 换幁频率:≥360Hz
- 白平衡亮度:≧800cd/㎡
- 刷新频率:≧500Hz
- 像素间距:5mm
- 模组尺寸:160mm*320mm
引脚说明
注意:DATA-IN和ADTA-OUT引脚顺序一样,POWER电源供电5V

| 标号 | 名称 | 功能描述 |
|---|---|---|
| 1 | DR1 | 高位R数据 |
| 2 | DG1 | 高位G数据 |
| 3 | DB1 | 高位B数据 |
| 4 | GND | 地 |
| 5 | DR2 | 低位R数据 |
| 6 | DG2 | 低位G数据 |
| 7 | DB2 | 低位B数据 |
| 8 | GND | 地 |
| 9 | A | A行选择 |
| 10 | B | B行选择 |
| 11 | C | C行选择 |
| 12 | D | D行选择 |
| 13 | CLK | 时钟 |
| 14 | LAT | 锁存 |
| 15 | OE | 输出启用 |
| 16 | GND | 地 |
DATA-IN and DATA-OUT
| 标号 | 名称 | 功能描述 |
|---|---|---|
| 1 | VCC | 5V电源 |
| 2 | VCC | 5V电源 |
| 3 | GND | 地 |
| 4 | GND | 地 |
POWER
使用教程
按照引脚说明连接好硬件,并下载样例代码到MEGA中,即可看到漂亮的显示效果。
准备
- 硬件
- 1 x MEGA控制板
- 1 x DFR0460
- 若干 杜邦线
- 软件
- Arduino IDE (版本要求:1.6.8), 点击下载Arduino IDE
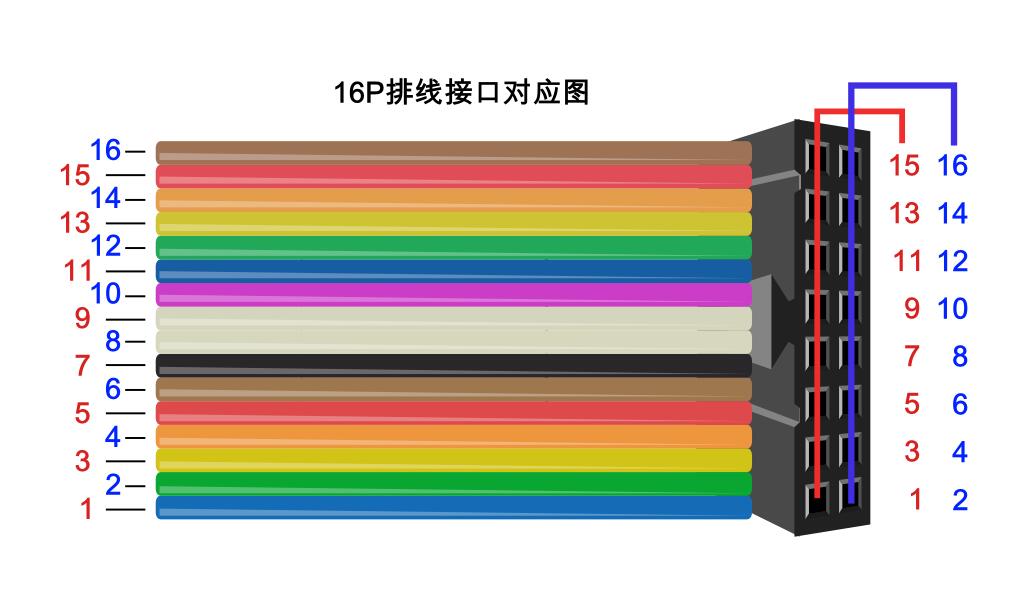
接线图

16P排线接口对应图
样例代码
点击下载DFRobot_RGBMatrix库文件。 如何安装库?
/*!
   @file DFR0499.ino
   @brief 64x64 RGB LED Matrix - 3mm pitch
   @n [Get the module here]()
   @n This example is to show different sizes of colorful characters and Chinese characters.
   @n [Connection and Diagram](https://wiki.dfrobot.com.cn/_SKU_DFR0499_64x64_RGB_LED_Matrix_-_3mm_pitch#.E6.A0.B7.E4.BE.8B.E4.BB.A3.E7.A0.81)

   @copyright  [DFRobot](https://www.dfrobot.com/), 2017
   @copyright GNU Lesser General Public License

   @author [lijun](ju.li@dfrobot.com)
   @version  V1.0
   @date  2017-05-16
*/

#include <DFRobot_RGBMatrix.h> // Hardware-specific library

#define OE    9
#define LAT   10
#define CLK   11
#define A     A0
#define B     A1
#define C     A2
#define D     A3
#define E     A4
#define WIDTH 64
#define HIGH  32

DFRobot_RGBMatrix matrix(A, B, C, D, E, CLK, LAT, OE, false, WIDTH, HIGH);


void setup()
{
  matrix.begin();
  delay(500);
}

void loop() {

  // draw a pixel in solid white
  matrix.drawPixel(0, 0, matrix.Color333(7, 7, 7));
  delay(5000);

  // fix the screen with green
  matrix.fillRect(0, 0, matrix.width(), matrix.height(), matrix.Color333(0, 7, 0));
  delay(5000);

  // fix the screen with white
  matrix.fillRect(0, 0, matrix.width(), matrix.height(), matrix.Color333(7, 7, 7));
  delay(5000);

  // fix the screen with red
  matrix.fillRect(0, 0, matrix.width(), matrix.height(), matrix.Color333(7, 0, 0));
  delay(5000);

  // fix the screen with blue
  matrix.fillRect(0, 0, matrix.width(), matrix.height(), matrix.Color333(0, 0, 7));
  delay(5000);
  // fill the screen with 'black'
  matrix.fillScreen(matrix.Color333(0, 0, 0));

  // draw a box in yellow
  matrix.drawRect(0, 0, matrix.width(), matrix.height(), matrix.Color333(7, 7, 0));
  delay(5000);

  // draw a box in fuchsia
  matrix.drawRect(5, 5, 53, 23, matrix.Color333(7, 0, 7));
  delay(5000);

  // draw a box in yellow
  matrix.drawRect(10, 10, 43, 13, matrix.Color333(7, 7, 0));
  delay(5000);

  // draw an 'X' in red
  matrix.drawLine(0, 0, matrix.width() - 1, matrix.height() - 1, matrix.Color333(7, 0, 0));
  matrix.drawLine(matrix.width() - 1, 0, 0, matrix.height() - 1, matrix.Color333(7, 0, 0));
  delay(5000);

  // draw a blue circle
  matrix.drawCircle(10, 10, 10, matrix.Color333(0, 0, 7));
  delay(5000);

  // fill a violet circle
  matrix.fillCircle(40, 21, 10, matrix.Color333(7, 0, 7));
  delay(5000);

  // fill the screen with 'black'
  matrix.fillScreen(matrix.Color333(0, 0, 0));

  // draw some text!
  matrix.setTextSize(1);     // size 1 == 8 pixels high
  matrix.setTextWrap(false); // Don't wrap at end of line - will do ourselves
  matrix.setCursor(3, 0);  // start at top left, with 3 pixel of spacing
  uint8_t w = 0;
  char *str = "Welcome ToDFROBOT";
  for (w = 0; w < 10; w++) {
    matrix.setTextColor(Wheel(w));
    matrix.print(str[w]);
  }

  matrix.setCursor(13, 8);    // next line
  for (w = 10; w < 17; w++) {
    matrix.setTextColor(Wheel(w));
    matrix.print(str[w]);
  }
  matrix.println();
  matrix.setCursor(2, 16);
  matrix.setTextColor(matrix.Color333(7, 7, 7));
  matrix.println("I'm always");

  // print each letter with a rainbow color
  matrix.setCursor(3, 24);
  matrix.setTextColor(matrix.Color333(7, 0, 0));
  matrix.print('B');
  matrix.setTextColor(matrix.Color333(7, 4, 0));
  matrix.print('y');
  matrix.setTextColor(matrix.Color333(7, 7, 0));
  matrix.print(' ');
  matrix.setTextColor(matrix.Color333(4, 7, 0));
  matrix.print('U');
  matrix.setTextColor(matrix.Color333(0, 7, 0));
  matrix.print(' ');
  matrix.setTextColor(matrix.Color333(0, 7, 7));
  matrix.print("S");
  matrix.setTextColor(matrix.Color333(0, 4, 7));
  matrix.print('i');
  matrix.setTextColor(matrix.Color333(0, 0, 7));
  matrix.print('d');
  matrix.setTextColor(matrix.Color333(4, 0, 7));
  matrix.print("e");
  matrix.setTextColor(matrix.Color333(7, 0, 4));
  matrix.println("!");
  delay(50000);


}


// Input a value 0 to 24 to get a color value.
// The colours are a transition r - g - b - back to r.
uint16_t Wheel(byte WheelPos) {
  if (WheelPos < 8) {
    return matrix.Color333(7 - WheelPos, WheelPos, 0);
  } else if (WheelPos < 16) {
    WheelPos -= 8;
    return matrix.Color333(0, 7 - WheelPos, WheelPos);
  } else {
    WheelPos -= 16;
    return matrix.Color333(0, WheelPos, 7 - WheelPos);
  }
}
结果
LED模组会轮流显示:一个白点、全屏绿色、全屏白色、全屏蓝色、全屏红色、一个黄色的矩形框、一个紫红色的矩形框、一个黄色的矩形框、一个红色的X、一个蓝色的圆、一个填充紫圆、欢迎字
常见问题
还没有客户对此产品有任何问题,欢迎通过qq或者论坛联系我们!
更多问题及有趣的应用,可以 访问论坛 进行查阅或发帖。
