概述
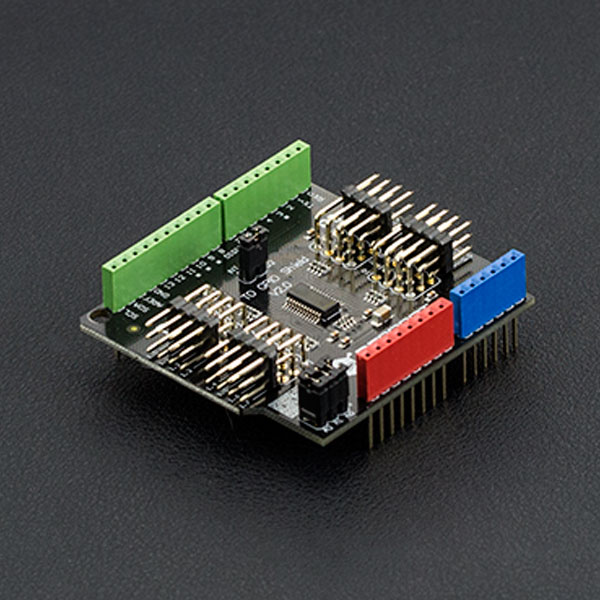
在使用Arduino做机器人或互动媒体时,有没有发现数字IO口不够用?现在I2C转I/O模块帮你解决问题,Arduino 只需要2根数据线(SCL-Analog PIN5,SDA-Analog PIN4)即可和I2C转I/O模块通讯,将转换出16路数字IO口,可读可写。可同时并联8个模块,每个模块可以设置不同I2C地址,以便您根据项目的数字口需要串联多个模块进行数据采集和控制。
技术规格
- 模块电源:+5V
- 扩展16个数字IO口自带内部上拉
- 可设置8个地址(地址范围0x20~0x27)
- 可同时并联8个模块(I2C总线需加上拉)
- 模块尺寸:56x53mm
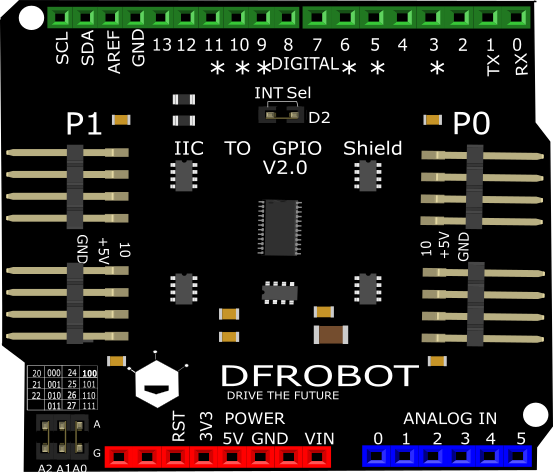
总览

插上 = 0
拔下 = 1
| A2 | A1 | A0 | I2C Address |
|---|---|---|---|
| 0 | 0 | 0 | 0x20 (默认) |
| 0 | 0 | 1 | 0x21 |
| 0 | 1 | 0 | 0x22 |
| 0 | 1 | 1 | 0x23 |
| 1 | 0 | 0 | 0x24 |
| 1 | 0 | 1 | 0x25 |
| 1 | 1 | 1 | 0x26 |
| 1 | 1 | 1 | 0x27 |
教程
准备
-
硬件
- DFRduino UNO x1
- I2C to GPIO 扩展板 V2.0 x1
- 按钮模块
- LED 模块
-
软件
- Arduino IDE V1.6.5 点击下载Arduino® IDE
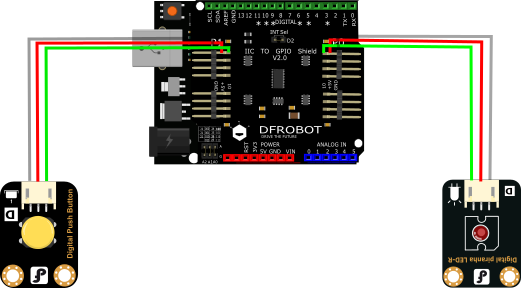
连接图

样例代码
这个环节,我们将使用nicoverduin写的Arduino 库
点击访问Github Library.
如何安装Arduino Library.
#if defined(ARDUINO) && ARDUINO >= 100
#include "Arduino.h"
#else
#include "WProgram.h"
#endif

#include "clsPCA9555.h"
#include "Wire.h"


PCA9555 ioport(0x20);

void setup()
{
  ioport.pinMode(7, OUTPUT); //Set GPIOs pinMode LED
  ioport.pinMode(8, INPUT);  //Button
}

void loop()
{
  if (ioport.digitalRead(ED8) == LOW) {
    ioport.digitalWrite(7, LOW);                  //Turn off Led
  }

  if (ioport.digitalRead(ED8) == HIGH) {
    ioport.digitalWrite(7, HIGH);                 //Turn on Led
  }

}
Arduino 库参数
Library功能
- pinMode() 与标准Arduino相当
- digitalRead() 与标准Arduino相当
- digitalWrite() 与标准Arduino相当
管脚映射
P0.0~P0.7 对应 GPIO 0 ~ 7 or ED0 - ED7
P1.0~P1.7 对应 GPIO 8 ~ 15 or ED8 - ED15
常见问题
还没有客户对此产品有任何问题,欢迎通过qq或者论坛联系我们!
更多问题及有趣的应用,可以 访问论坛 进行查阅或发帖!
更多
历史V1.0维库
原理图 V2.0
Layout V2.0
svg矢量图
PCA9555数据手册
 [Link DFRobot商城购买链接]
