简介
采用ACS758芯片的电流检测模块,是一款增强散热功能、高电流、基于霍尔效应的线性电流传感器,可精确检测交流或直流电流,最大检测电流50A。厚实的导电铜使得传感器能够承受大量瞬间过载电流。ASC758输出模拟电压信号,其能够随电流大小呈现线性的变化。 这款传感器不仅能够实时监测电流,而且具有低功耗和保护电路的特点。输入输出端开孔设计,可以焊接粗电源线。开槽设计可以焊接T型连接器。板子上还标明了应接入电流的正负极。用户可以自己焊接电源线或者在两端用铁夹子夹住。
典型应用包括电动机控制、载荷检测和管理、航模和机器人过流检测。
产品参数
- 传感器类型:模拟
- 传感器工作电压:3.0-5.5V
- 峰值测量电压:3000V(AC),500V(DC)
- 测量电流范围:-50~50A
- 传感器工作电流:13.5mA(MAX)
- 灵敏度:40mV/A
- 分辨率:1A(常温,具体参看ACS758芯片手册)
- 超低功耗:100μΩ内部阻
- 安装孔:直径3.2mm 间距25.4mm
- 工作温度:-40~50 ℃
- 模块尺寸:34 x 34mm
引脚说明

使用教程
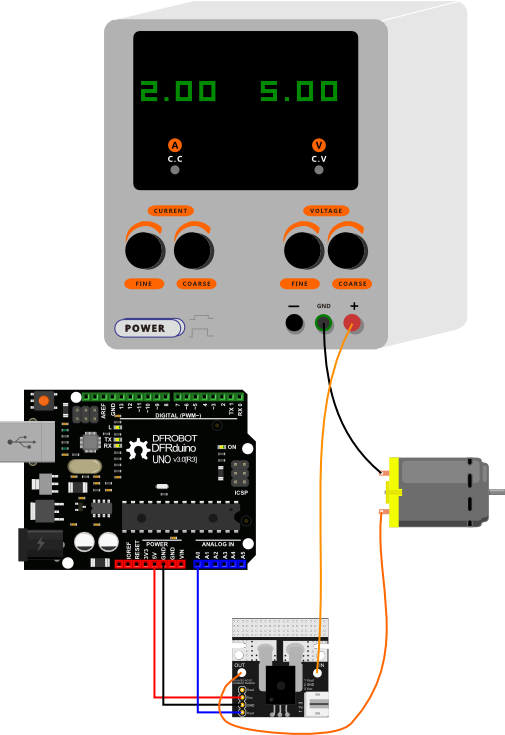
连线图


危险:
该接线图同样适用于交流电的测量。但需要注意的是:传感器模块一定要串接在一根电线上(正负均可),不能并联在电路中,也就是不能再正负极的电线上各接一根,否则将会短路,造成危险! |
直流负载
样例代码
    /*
    50A Current Sensor(AC/DC)(SKU:SEN0098) Sample Code
    This code shows you how to get raw datas from the sensor through Arduino and convert the
    raw datas to the value of the current according to the datasheet;

    Smoothing algorithm (http://www.arduino.cc/en/Tutorial/Smoothing) is used
    to make the outputting current value more reliable;

    Created 27 December 2011
    By Barry Machine
    www.dfrobot.com
    Version:0.2
    */
    const int numReadings = 30;
    float readings[numReadings];      // the readings from the analog input
    int index = 0;                  // the index of the current reading
    float total = 0;                  // the running total
    float average = 0;                // the average
    float currentValue = 0;

    void setup(){
      Serial.begin(57600);
      for (int thisReading = 0; thisReading < numReadings; thisReading++)
        readings[thisReading] = 0;
    }
    void loop(){
        total= total - readings[index];
        readings[index] = analogRead(0); //Raw data reading

        //Data processing:510-raw data from analogRead when the input is 0; 5-5v;
        //the first 0.04-0.04V/A(sensitivity); the second 0.04-offset val;

        readings[index] = (readings[index]-510)*5/1024/0.04-0.04;
        total= total + readings[index];
        index = index + 1;
        if (index >= numReadings)
          index = 0;
        average = total/numReadings;
        currentValue= average;
        Serial.println(currentValue);
        delay(30);
    }
结果
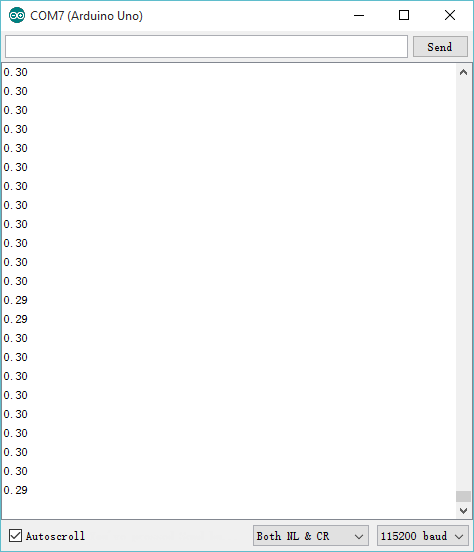
上传程序后,打开串口监视窗,当输入电流为0时,你可能会发现读数并不为零。如果你想要非常精确的电流读数的话,建议进行以下 调零操作。
1 当电流输入为0时,记录串口读数:

2 按照下面公式计算 偏差值;
-0.34 = -0.04 - ( +0.30 )
3 将代码中原始的 偏差值 -0.04改为 -0.34

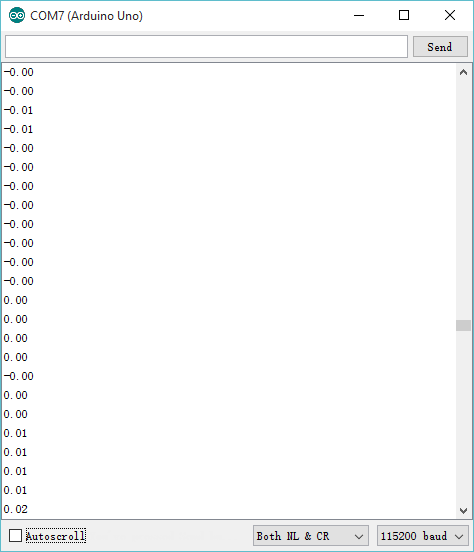
4 重新上传修改后的代码,你应该可以读到0A。如果没有,可以重复以上步骤。

5 如上图所示,连接后,可精确检测直流电流,输出模拟电压信号。
交流负载
样例代码
float reading = 0;
float currentValue = 0;

void setup(){
  Serial.begin(115200);
}
void loop() {
  reading = analogRead(*); //Raw data reading
  currentValue = (reading - 510) * 5 / 1024 / 0.04 - 0.34;
  Serial.println(currentValue);
  delay(2);
}
结果
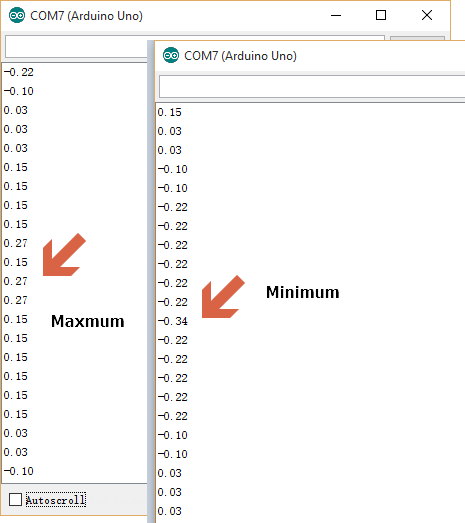
作者使用了一个220V的灯泡作为测试对象,并且得到了以下数据: 推荐阅读【英文】:Read more about the experiment.

观察一组数据,可以发现,是类似于正弦波的数据(为电流的有效值),并且图中可以看出极值分别为0.27A 和 -0.34A,取其中的绝对值最大的值为交流电的有效值(约等于实际安培表的读数)。
疑难解答
更多问题及有趣的应用,可以 访问论坛 进行查阅或发帖! |
更多
|} category: Product Manual category: SEN Series category: Sensors category: Source category: Diagram
